Documentation Index
Fetch the complete documentation index at: https://docs.jitera.ai/llms.txt
Use this file to discover all available pages before exploring further.
Automation is in BETA.
Creating an Automation
- Open the agent’s configuration page
- Scroll to the Automation section and click Add automation
- Choose a trigger type and configure it (see below)
- Enter the Prompt — the instruction text that tells the agent what to do when triggered
- Click Create
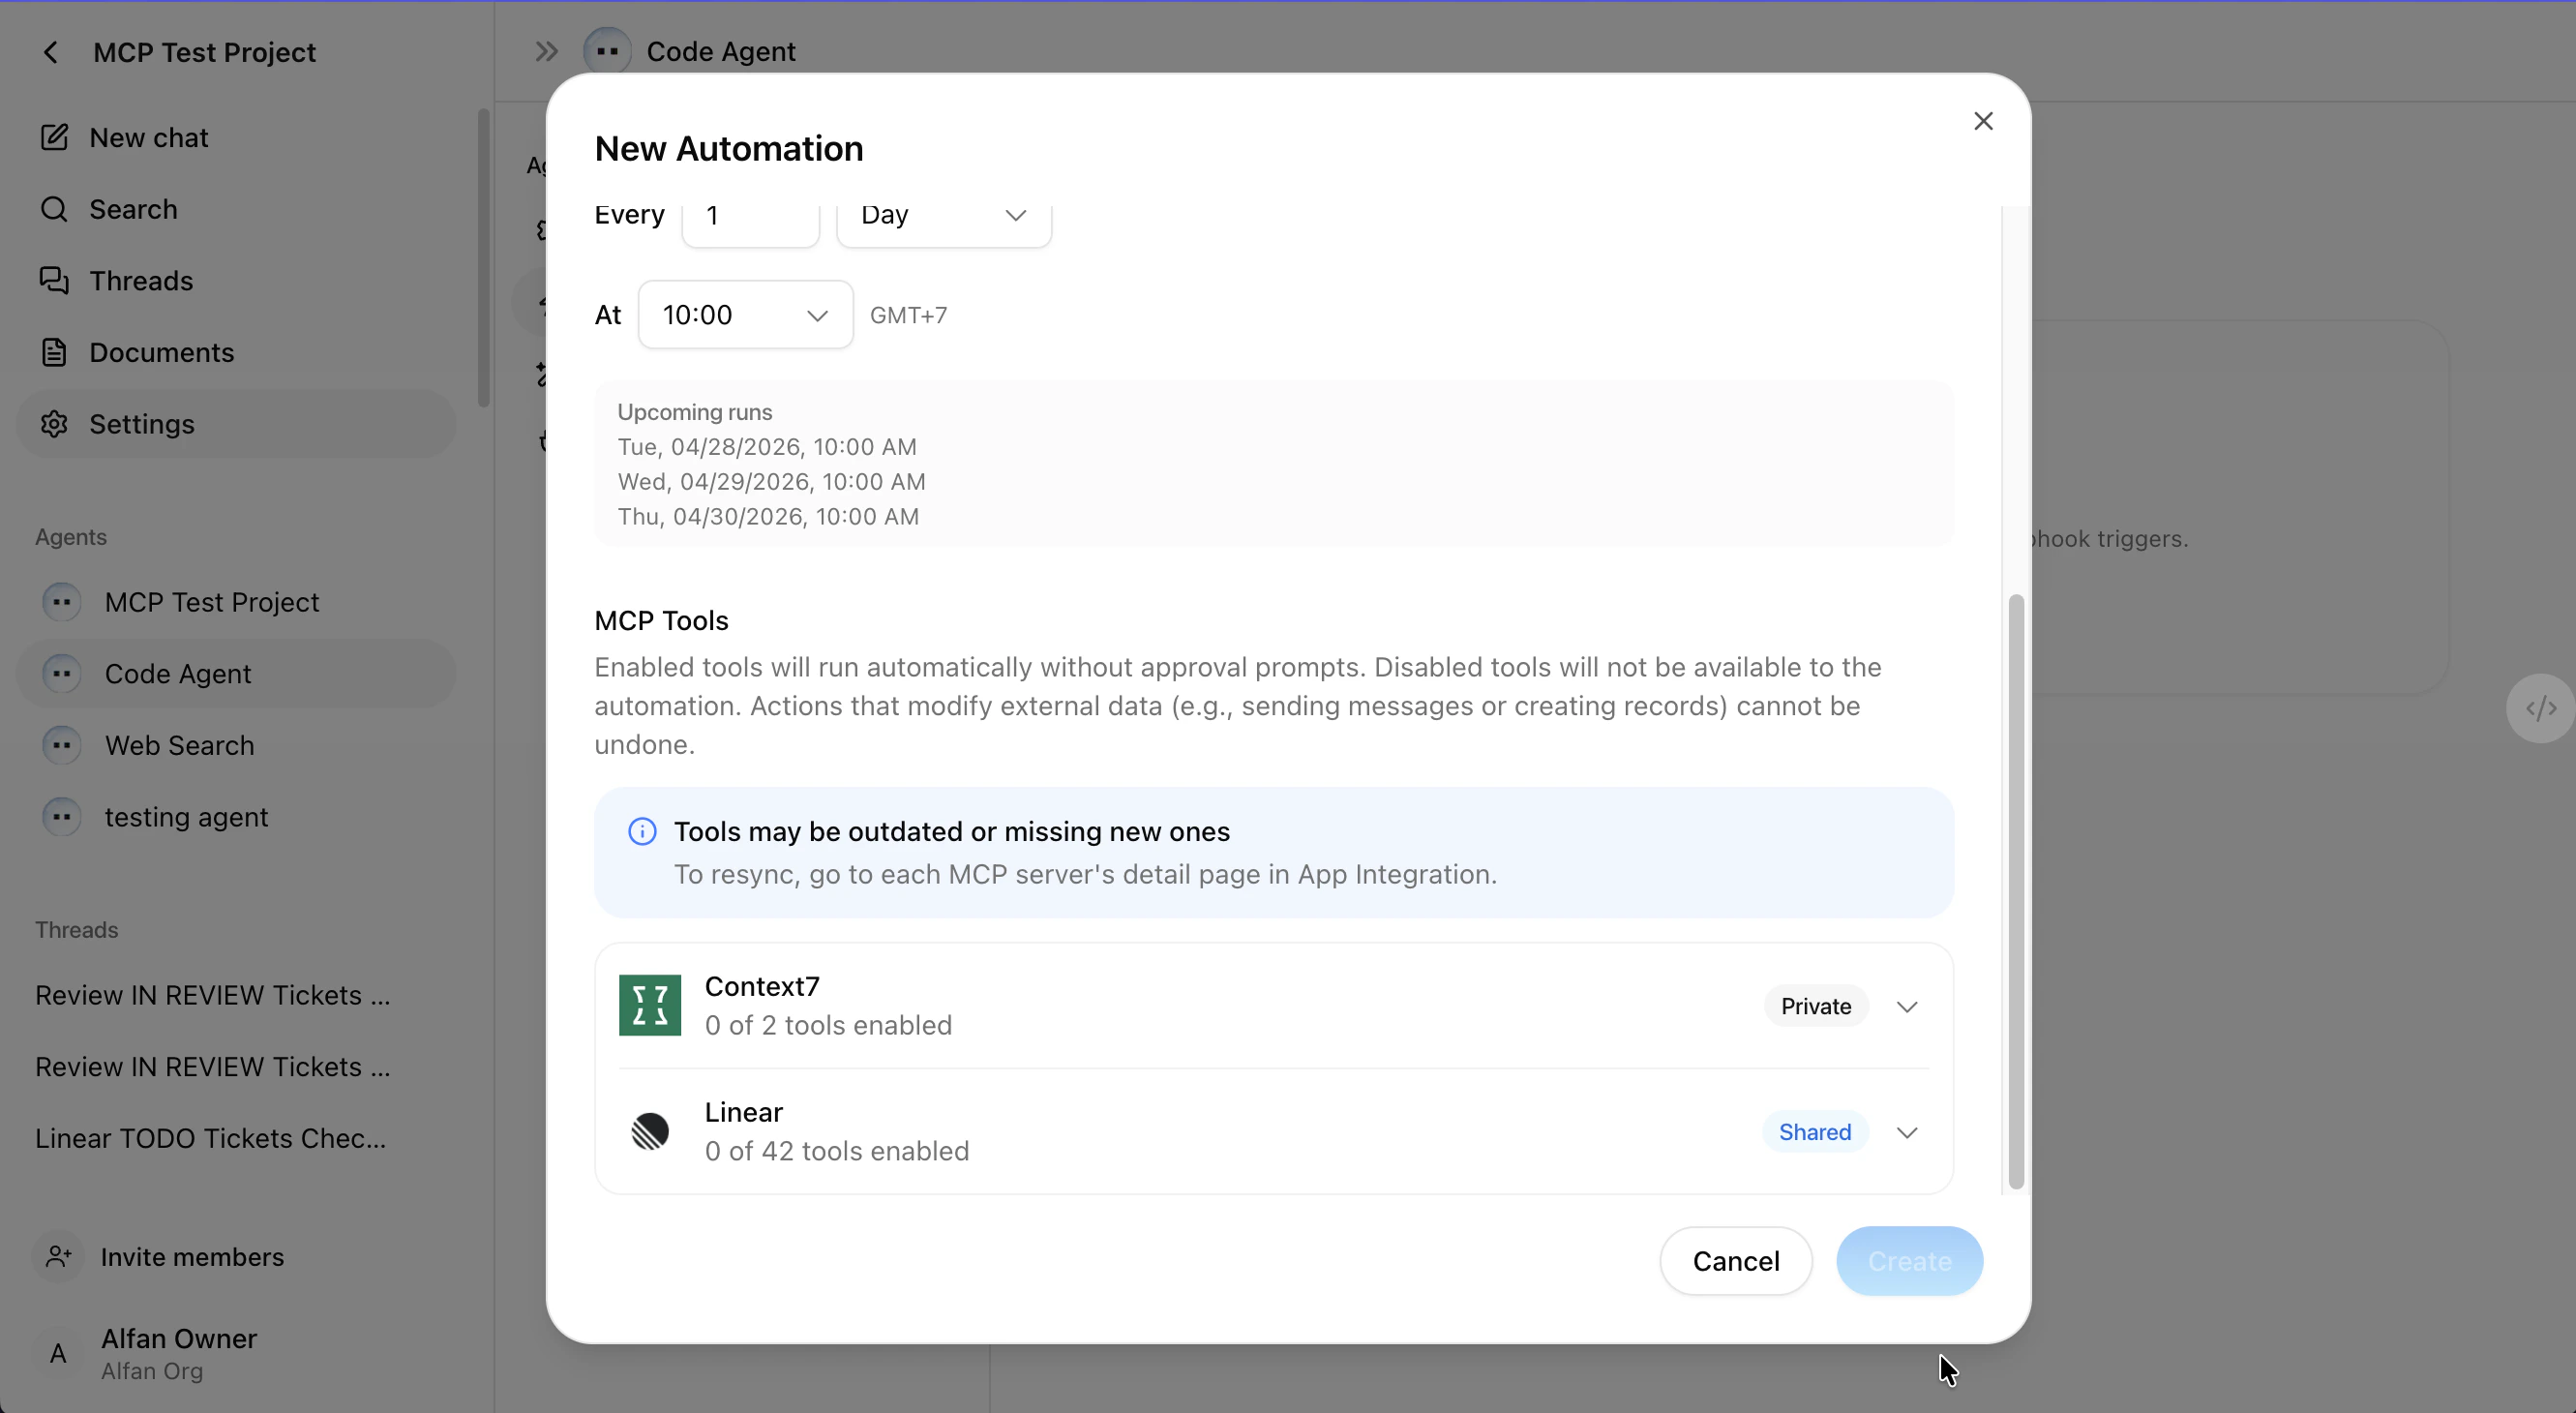
Schedule Triggers
Run an automation on a recurring schedule:| Frequency | Options |
|---|---|
| Every minute | Runs every minute |
| Hourly | Select the minute of each hour |
| Daily | Select the time of day |
| Weekly | Select one or more days of the week and the time |
| Monthly | Select a specific date, or a relative day (e.g., “first Monday”), and the time |
Webhook Triggers
Run an automation when an external system sends a request:- Create the automation with Webhook as the trigger type
- A Webhook Secret is displayed at creation — copy it immediately, as it cannot be retrieved later
- External systems trigger the automation by sending a
POSTrequest:
Prompt
Skills in Prompts
When creating an automation, you can insert skills (abilities) into the prompt to give the agent access to specialized capabilities during execution.- In the prompt editor, click the + button
- Select a skill from the list of enabled skills
- The skill is inserted into the prompt as a tagged reference
Skills in prompts require the agent_skills feature flag to be enabled.
MCP Tools
When you create an automation, the MCP tools picker shows the apps the job can actually use:- Shared apps connected to the agent
- Your own Private apps
Job Ownership
Each automation belongs to its creator and runs as that user — whether triggered manually, on a schedule, or by a webhook. Your own Private apps keep working in your scheduled and webhook automations, even when no one is signed in; apps owned by other users are never used on your behalf. The automation list shows only the jobs you created. Teammates’ automations are not displayed, and other members of the agent cannot edit, disable, or trigger yours.Managing Automations
From the automation list, you can:- Enable / Disable — Toggle an automation on or off without deleting it
- Edit — Modify the schedule, prompt, or other settings
- Delete — Permanently remove the automation
- Cancel — Stop a currently running execution
- Retry — Re-run a failed execution
You cannot edit or delete an automation while it is running. Wait for the execution to complete or cancel it first.
The trigger type (schedule or webhook) cannot be changed after creation. To switch trigger types, delete the automation and create a new one.
Automation Status
| Status | Description |
|---|---|
| Awaiting run | Triggered and queued for execution |
| Running | Currently executing |
| Completed | Finished successfully |
| Failed | Execution encountered an error |
Related
- Managing Agents — Agent creation and configuration
- Apps (MCP) — Connecting MCP apps and managing their access scope
- Skills — Adding AI capability packages
- API & MCP Access — Accessing agents from external tools