This guide walks you through connecting Jitera to Microsoft Entra ID (formerly Azure AD) using SAML 2.0. By the end, your team members can sign in to Jitera with their Entra ID credentials.Documentation Index
Fetch the complete documentation index at: https://docs.jitera.ai/llms.txt
Use this file to discover all available pages before exploring further.
All values shown on this page are examples. Replace them with the actual values from your Entra ID tenant and Jitera organization.
Prerequisites
- A Jitera organization on the Enterprise plan (SSO is an Enterprise-only feature)
- Owner role in that Jitera organization
- Global Administrator or Cloud Application Administrator role in your Entra ID tenant
- One or more email domains you want to enforce SSO for (e.g.
example.com)
What you will set up
| Side | What | Why |
|---|---|---|
| Entra ID | Enterprise Application with SAML SSO | Tells Entra ID to trust Jitera as a service provider |
| Jitera | SSO configuration | Tells Jitera to trust your Entra ID tenant as an identity provider |
Step 1: Open the Jitera SSO dialog
Go to Organization Settings > General and click the Single sign-on (SSO) row to open the configuration dialog.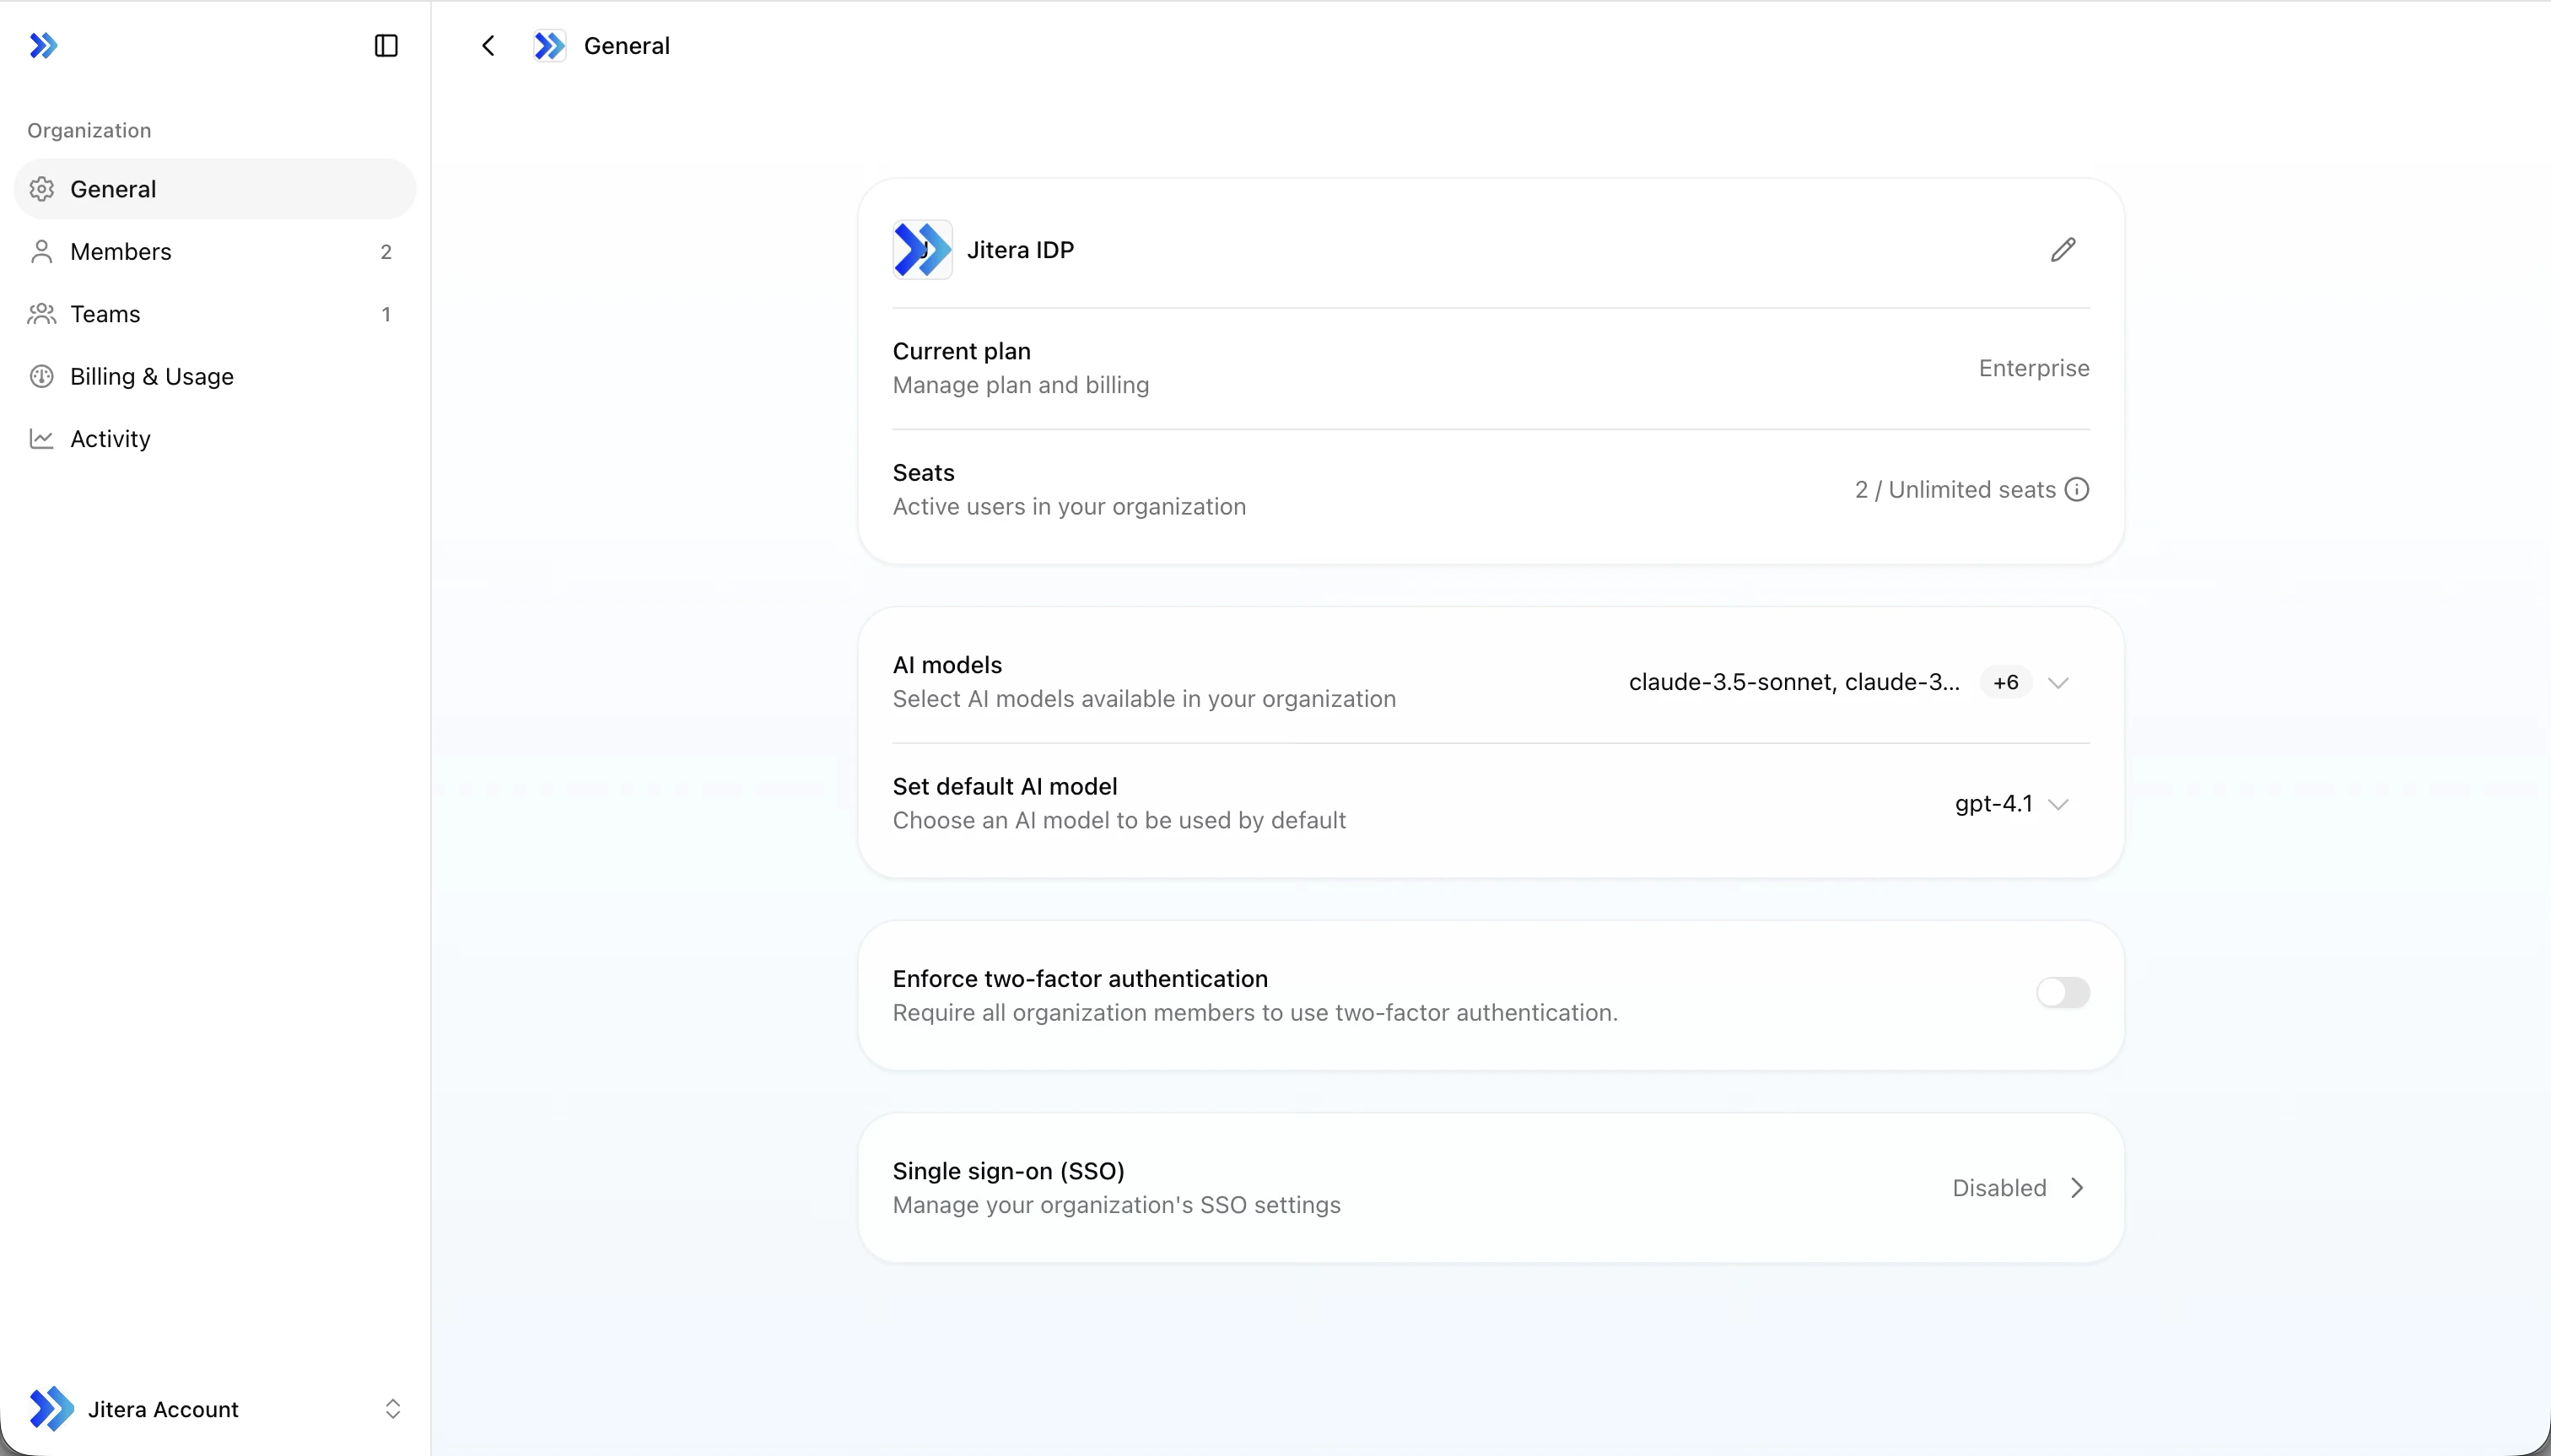
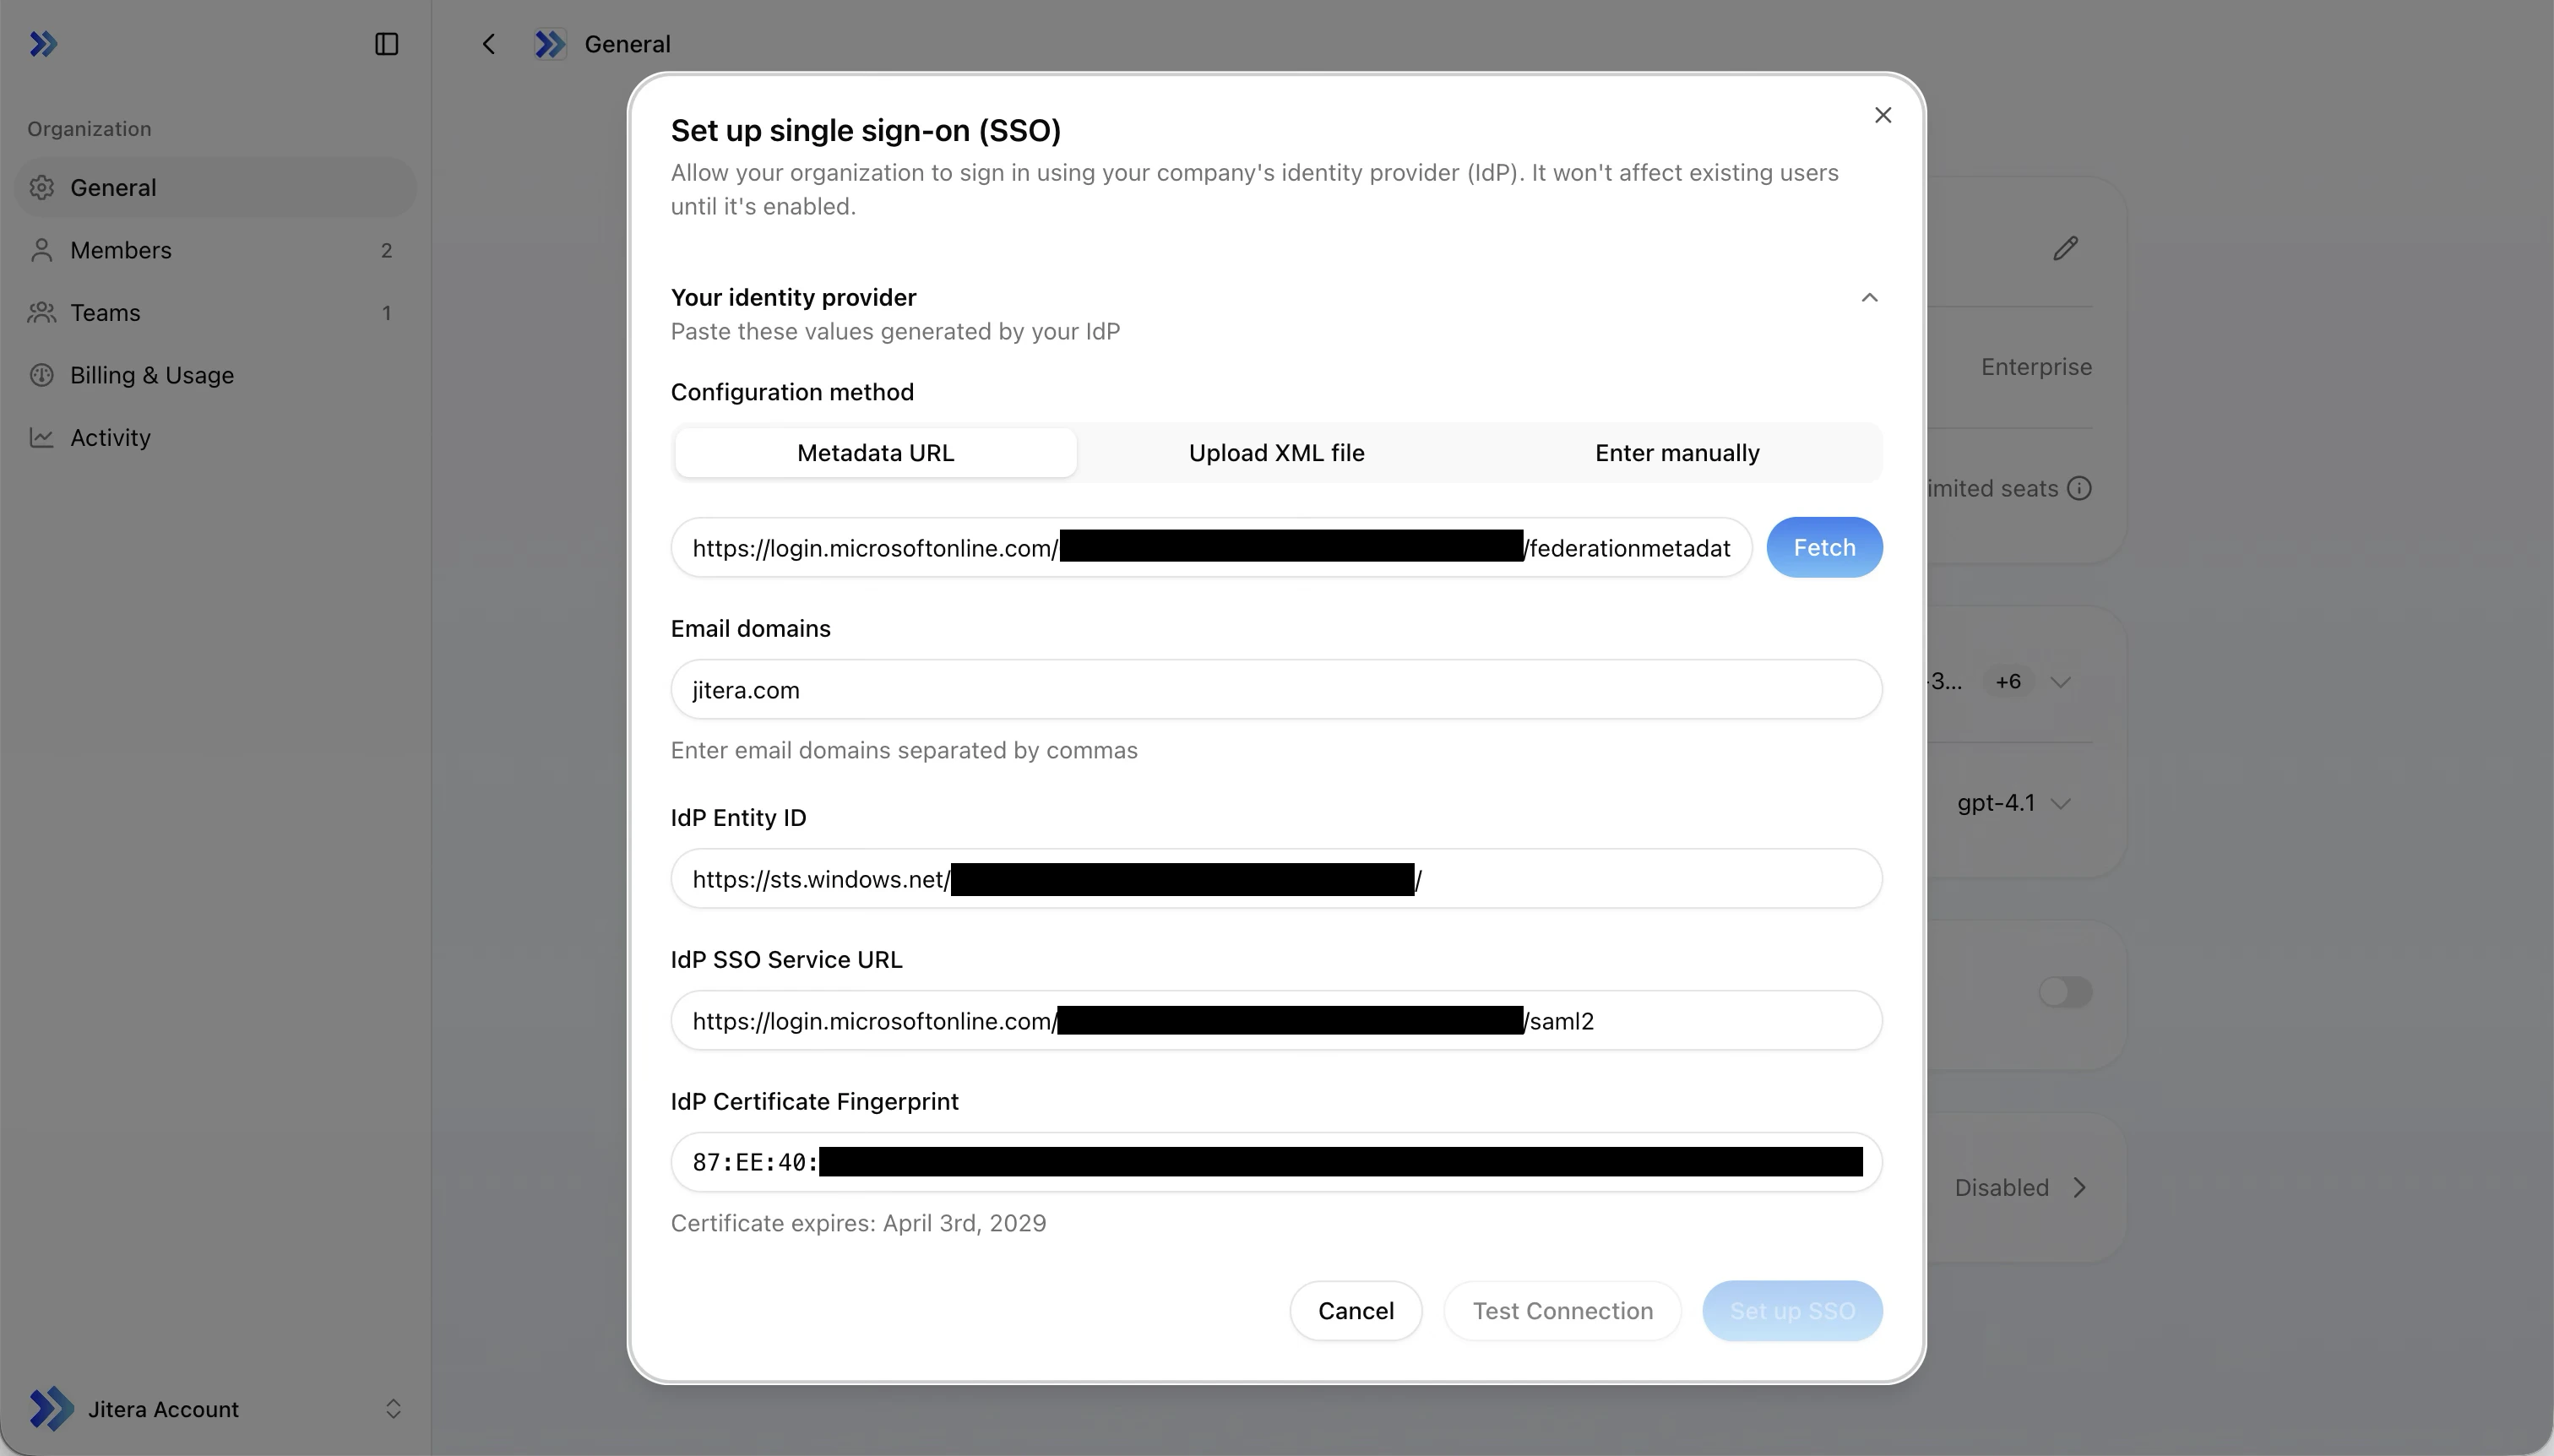
| Field | Example value |
|---|---|
| Issuer | https://api.jitera.app/saml_sso/a1b2c3d4-e5f6-7890-abcd-ef1234567890 |
| Assertion Consumer Service URL | https://api.jitera.app/users/saml/auth |
Step 2: Create an Enterprise Application in Entra ID
Open the Entra admin center
Go to Microsoft Entra admin center and sign in with an administrator account.
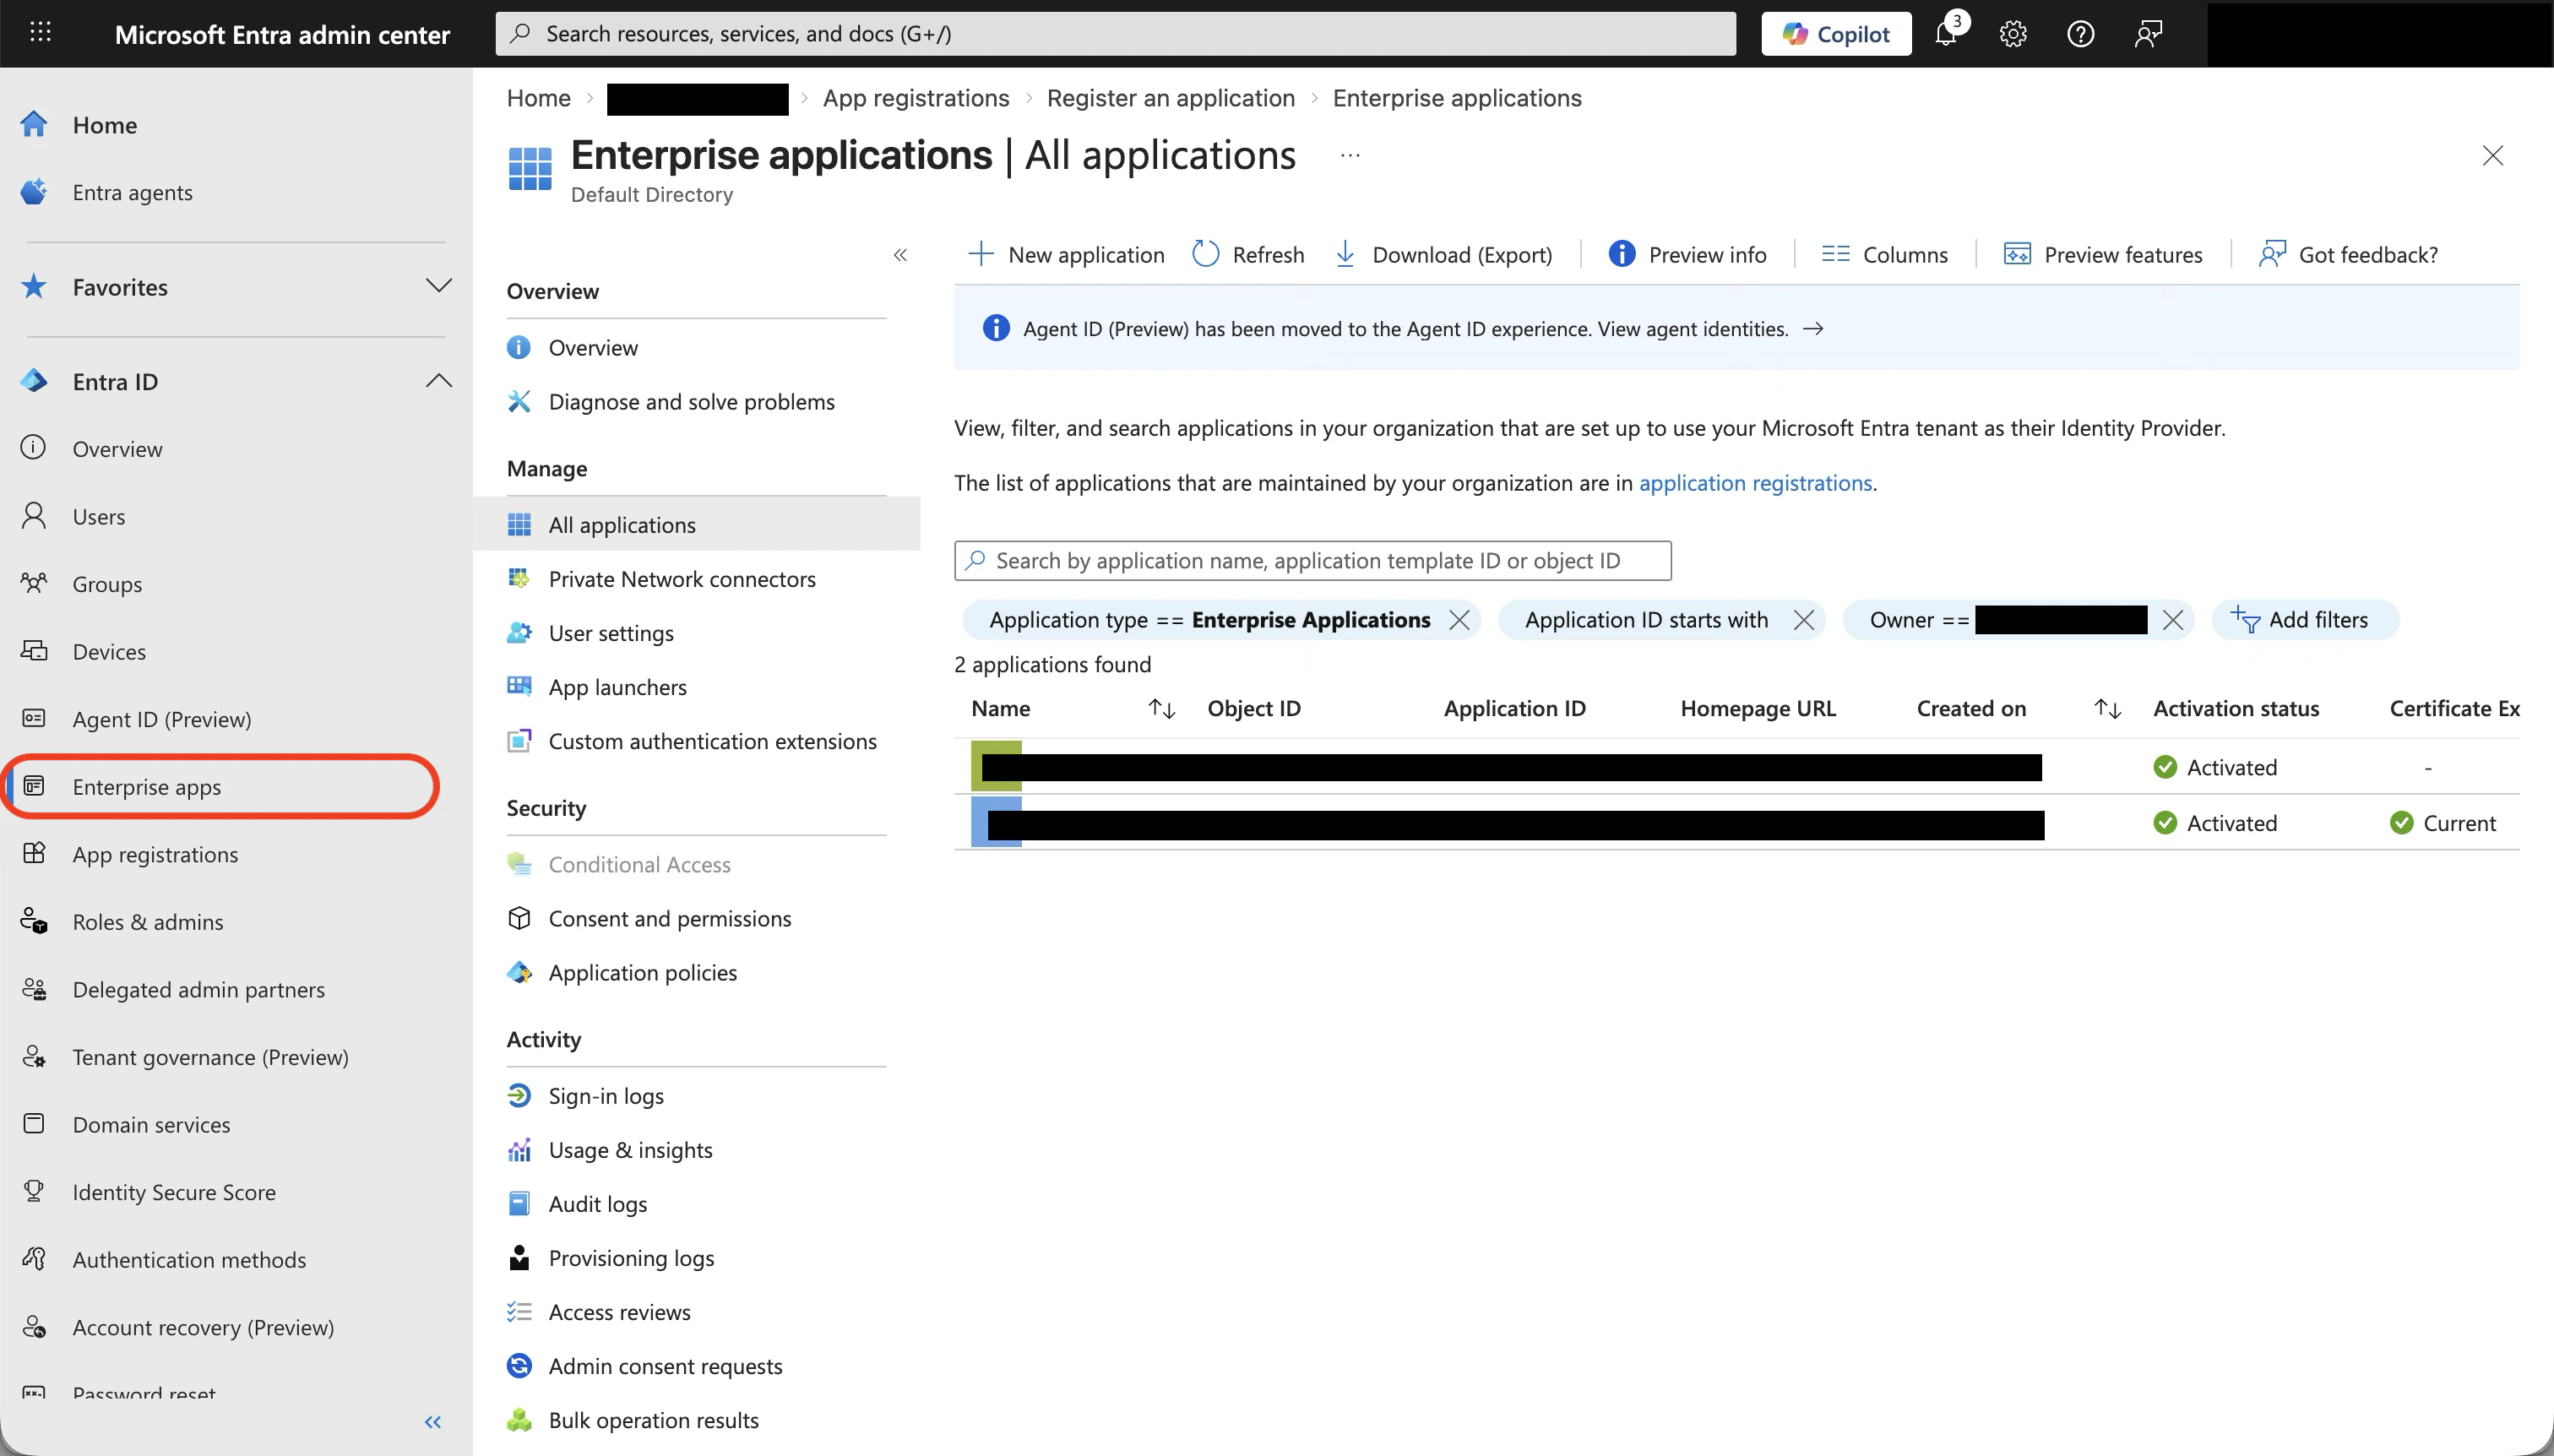
Start creating a new application
Click + New application at the top. The Microsoft Entra App Gallery opens.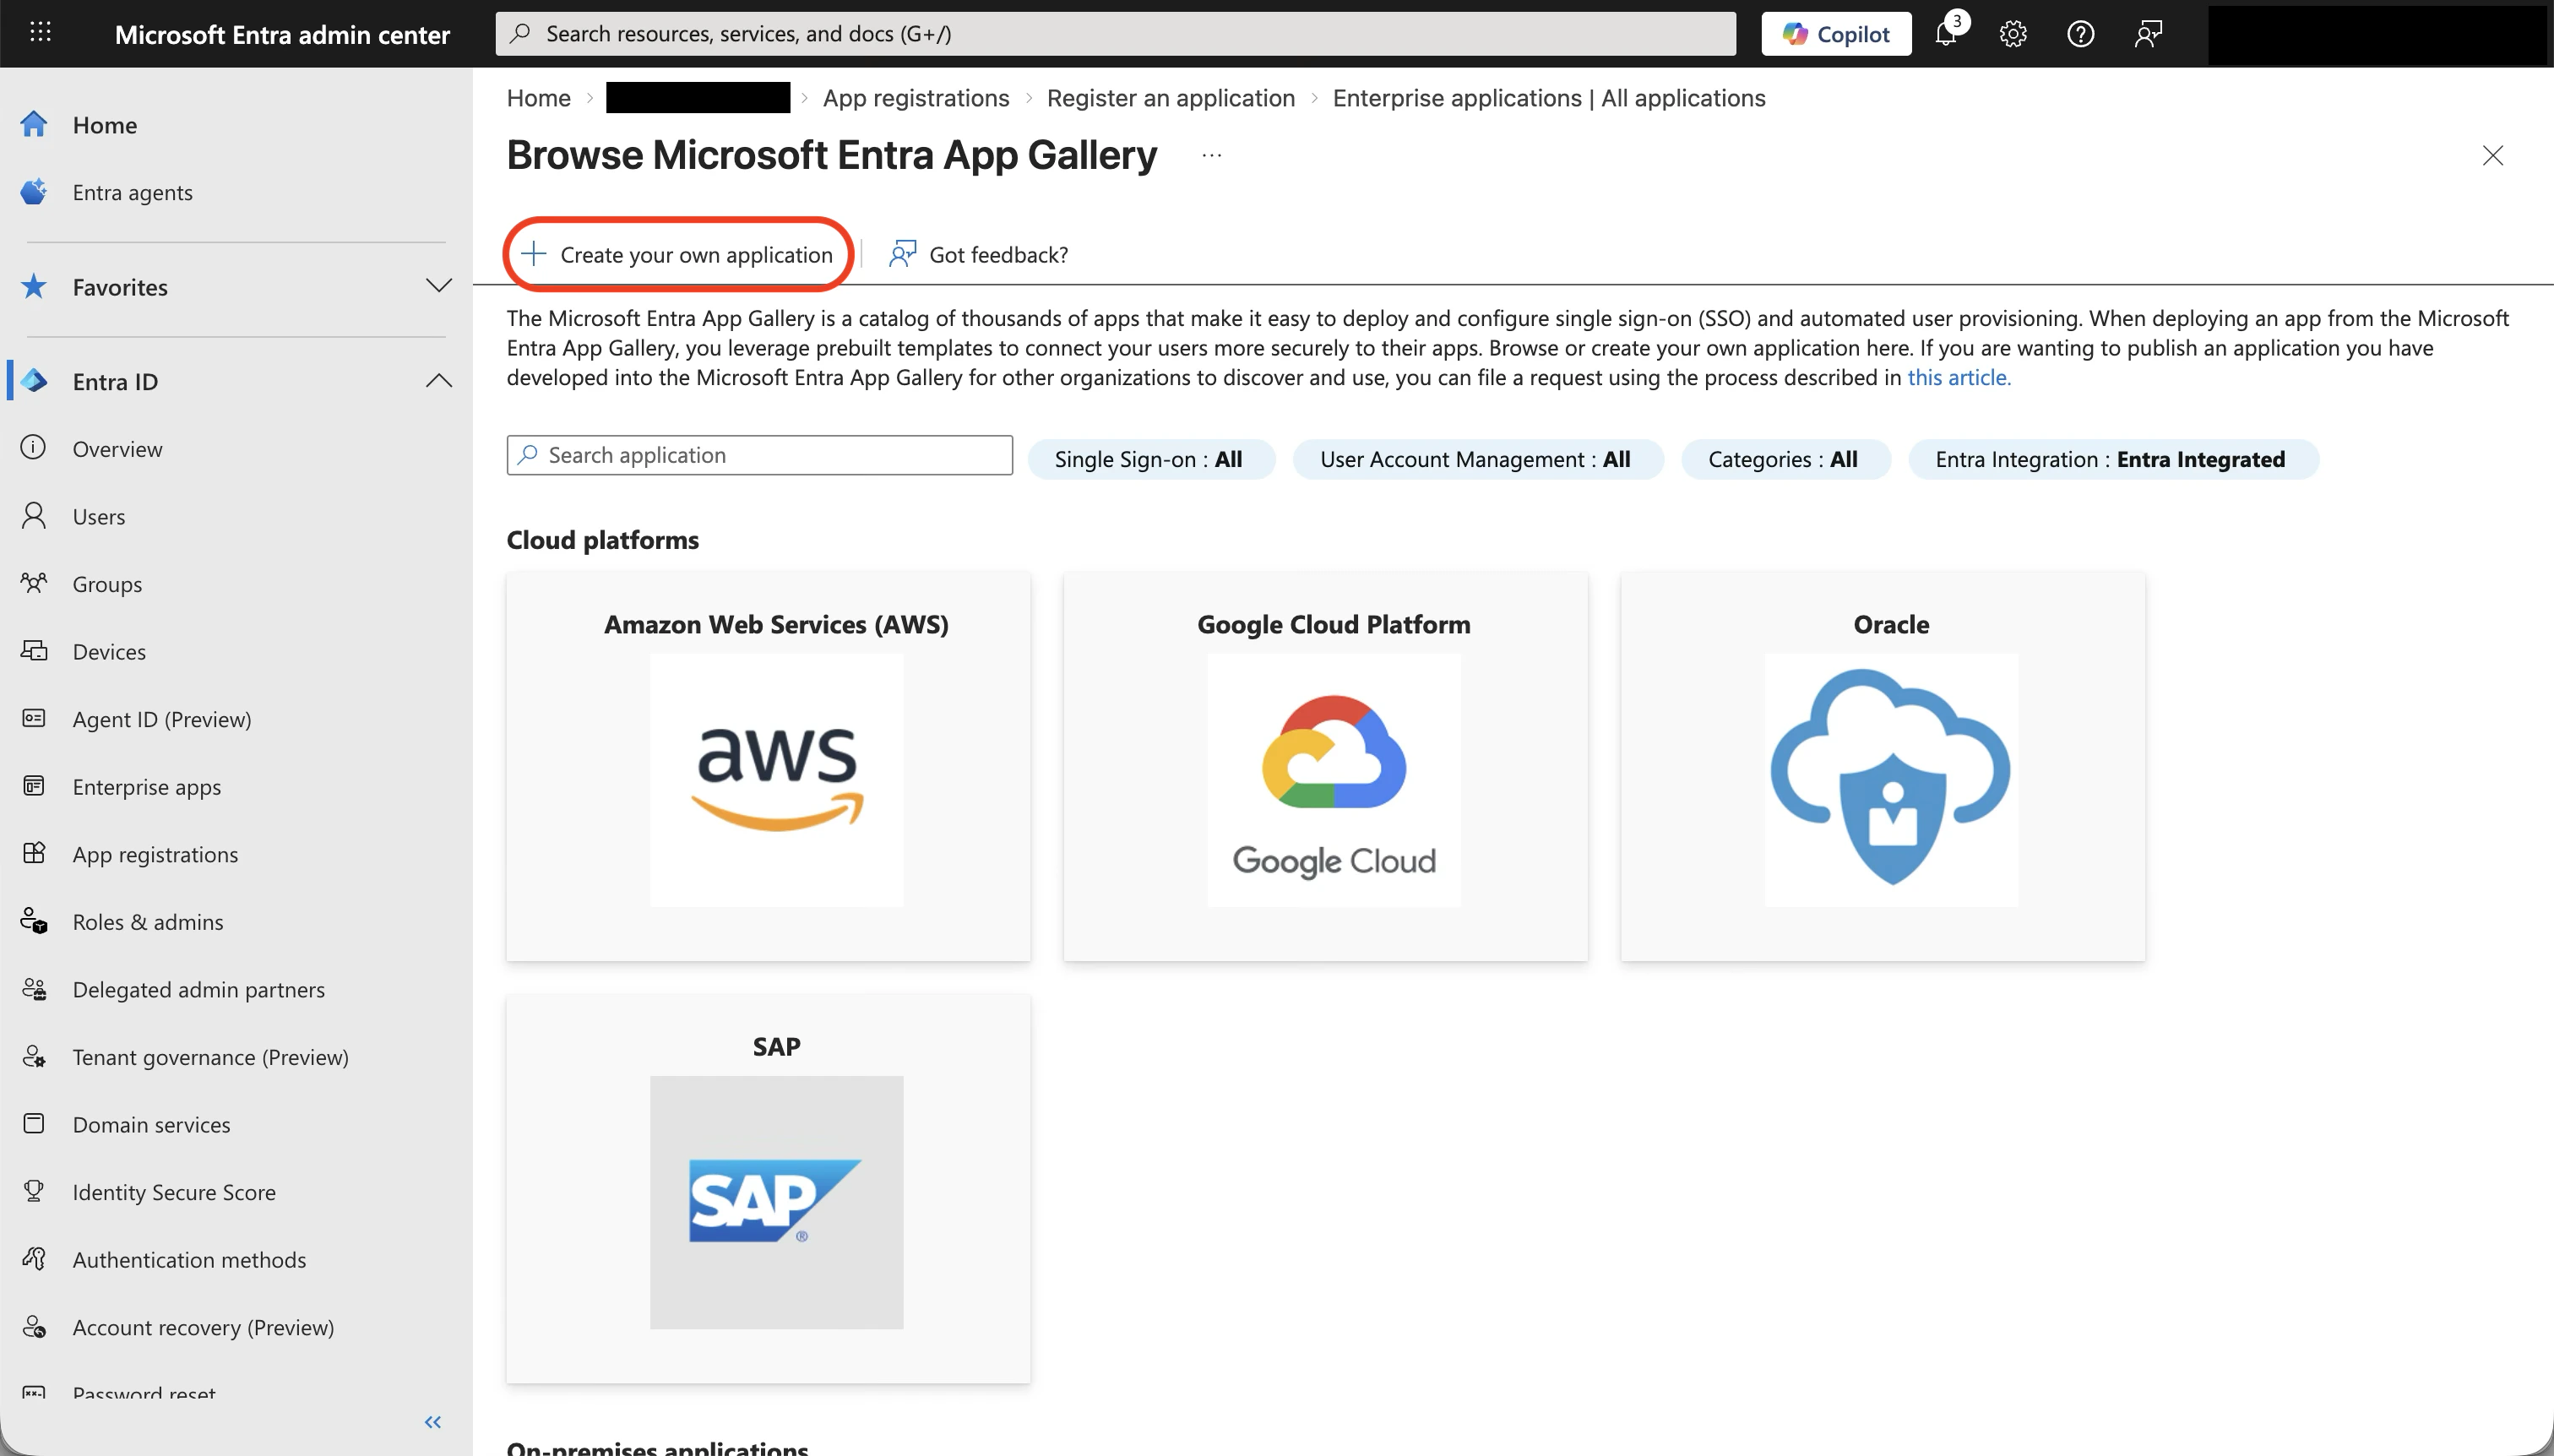
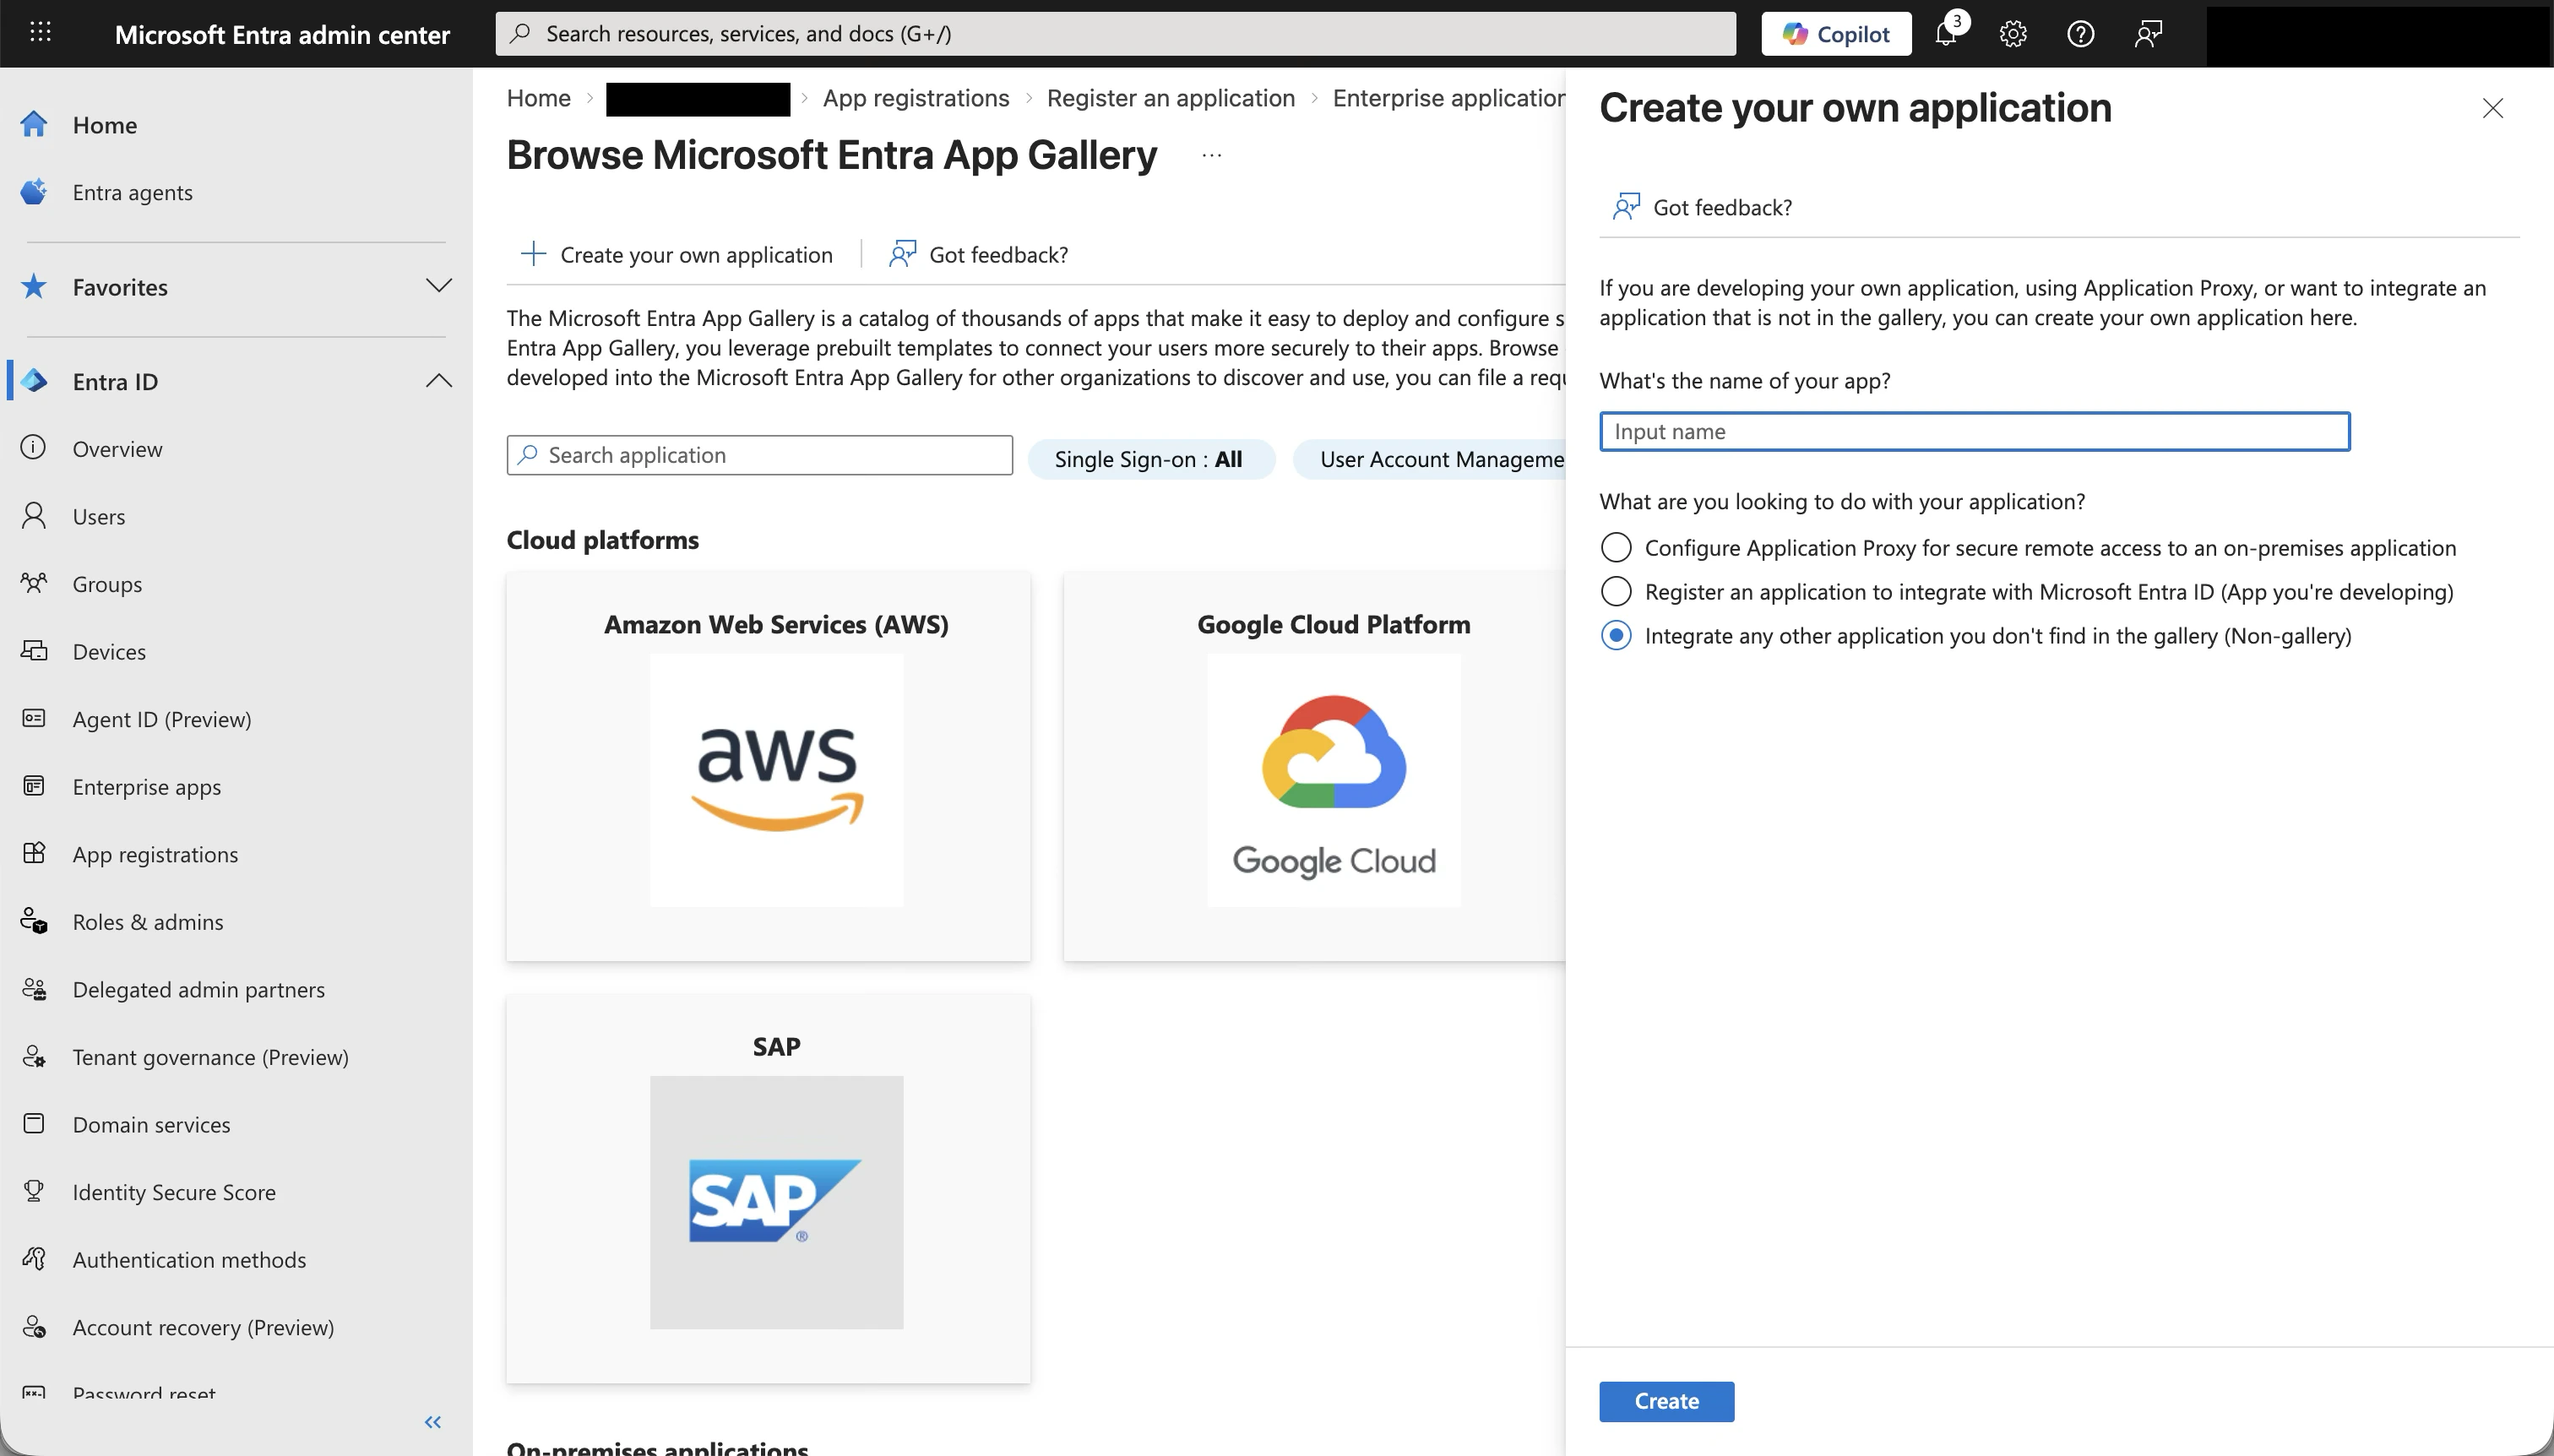
Create your own application
Click + Create your own application at the top. A dialog opens on the right.
-
Enter a name for the application (e.g.
Jitera) - Select Integrate any other application you don’t find in the gallery (Non-gallery)
-
Click Create
Open Single sign-on settings
After the application is created, you land on the application overview page. In the left sidebar under Manage, click Single sign-on.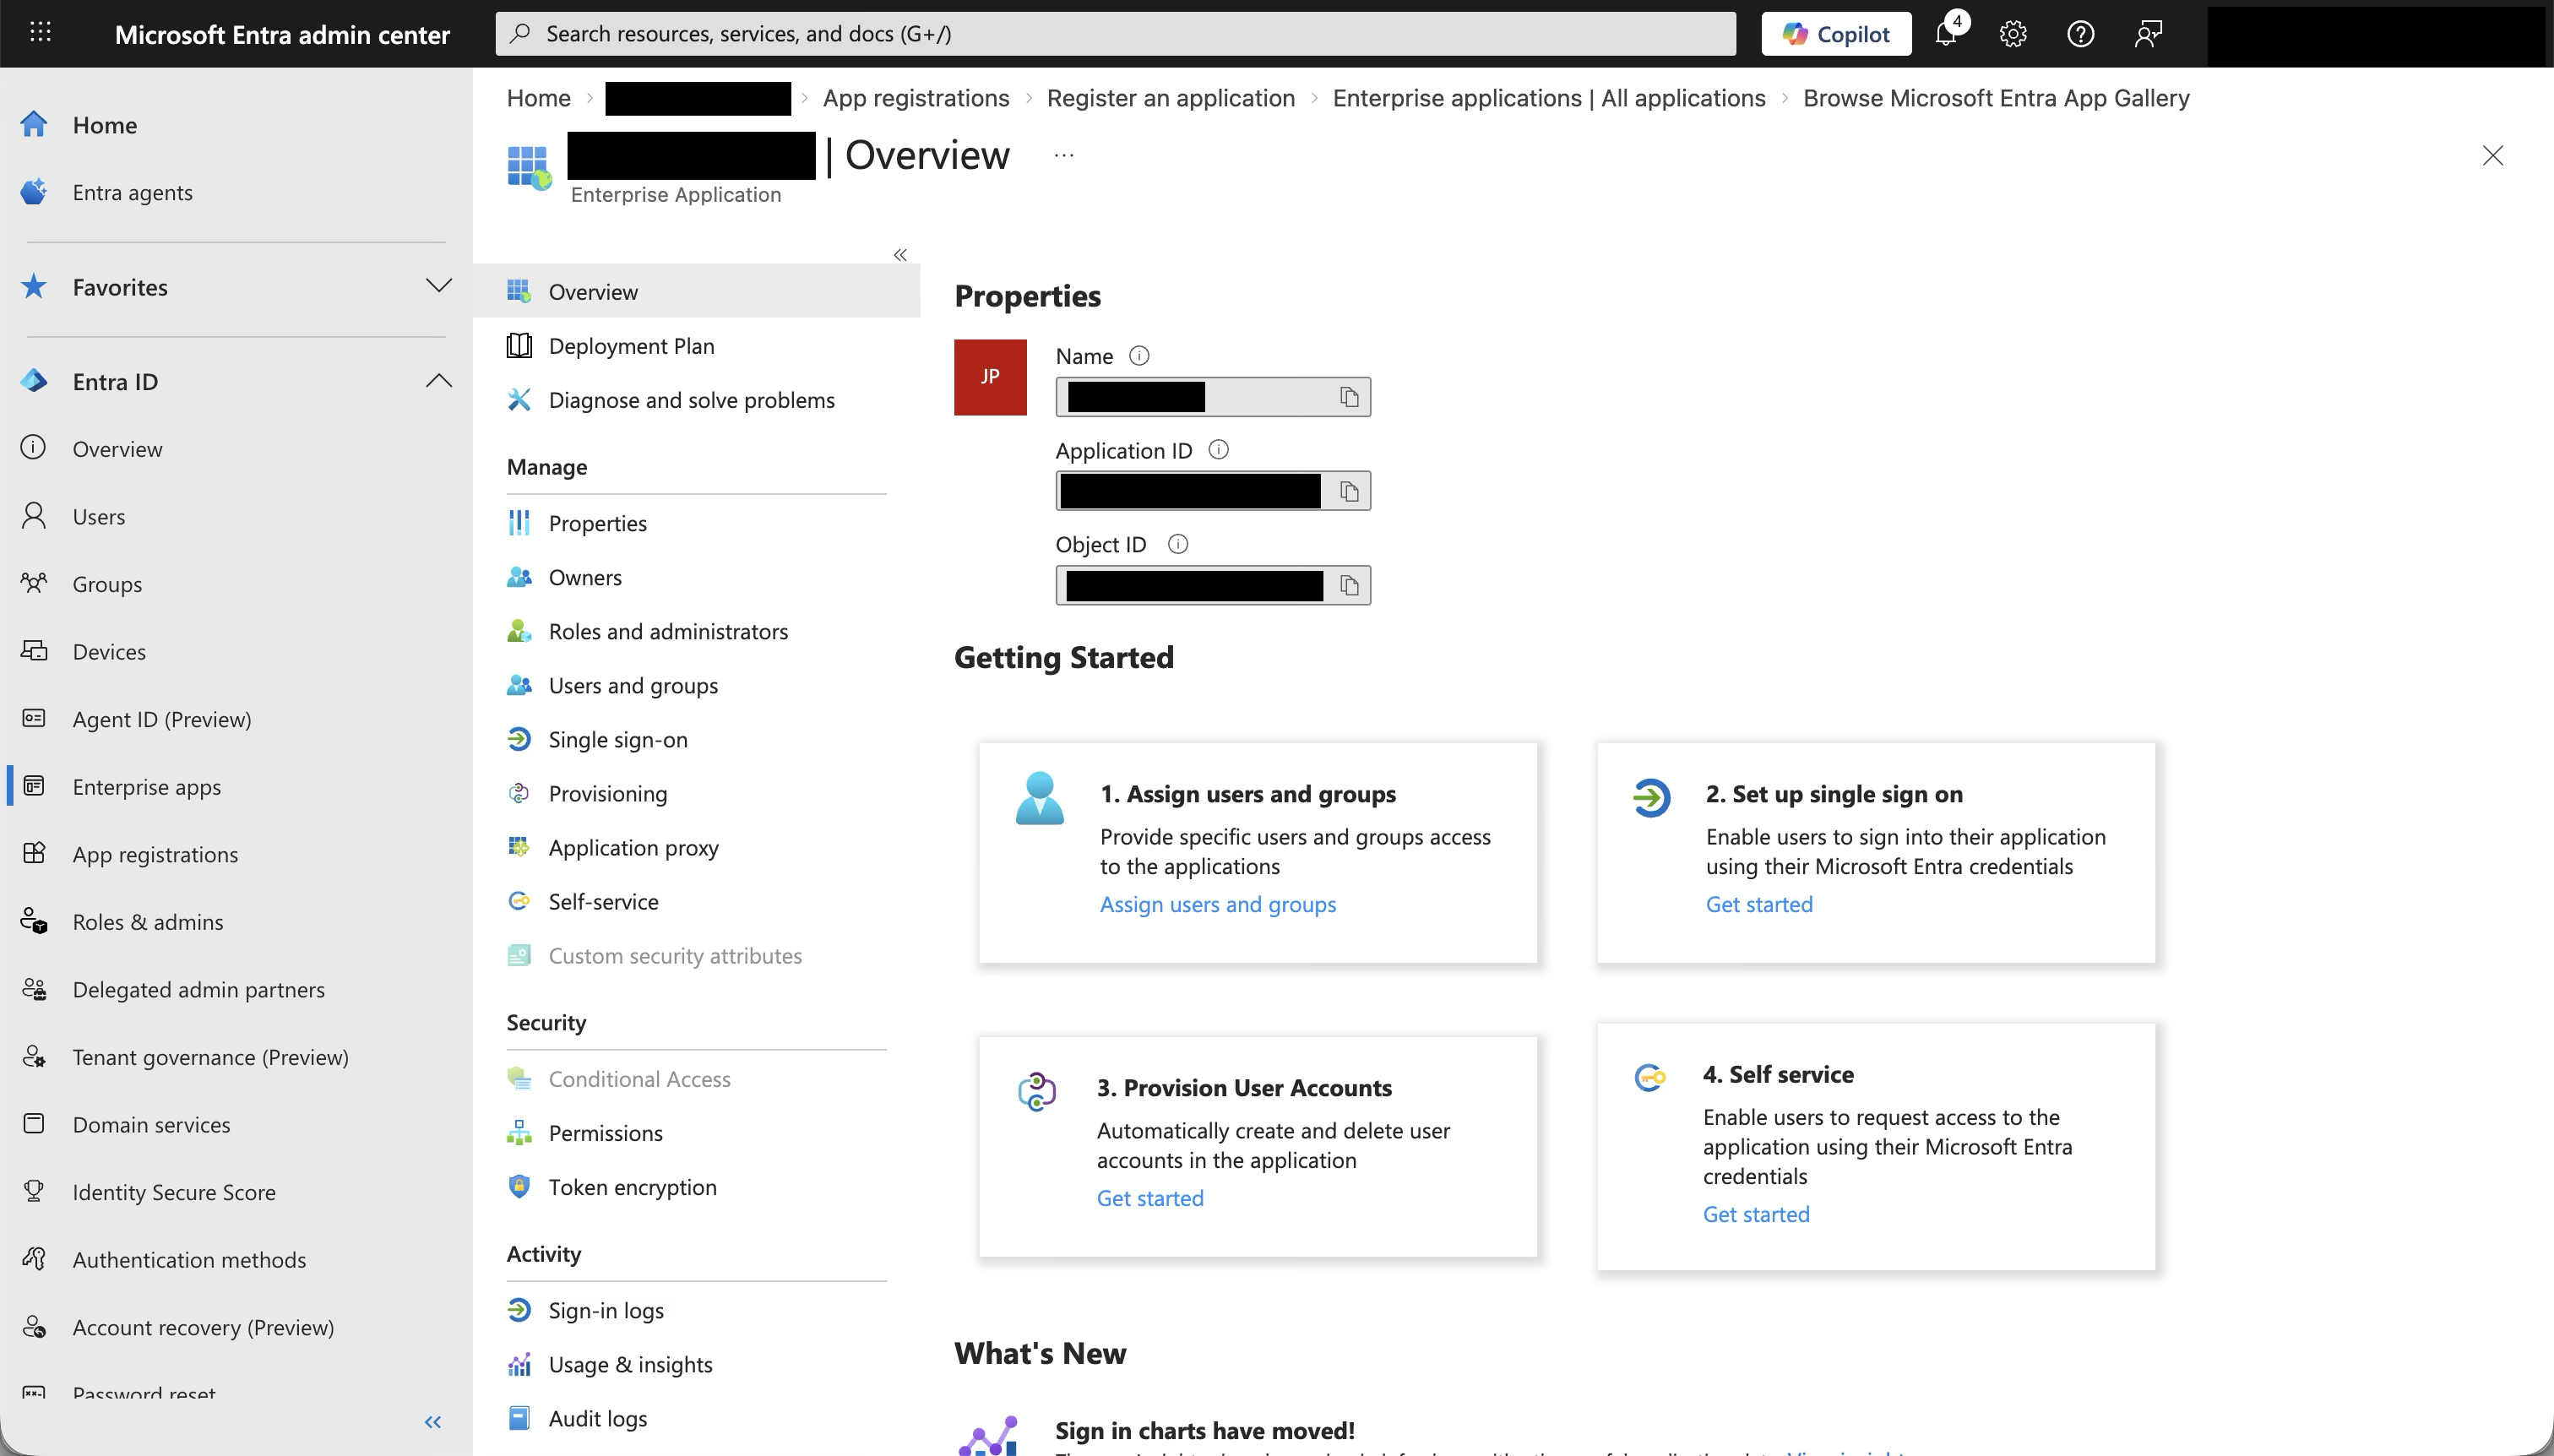
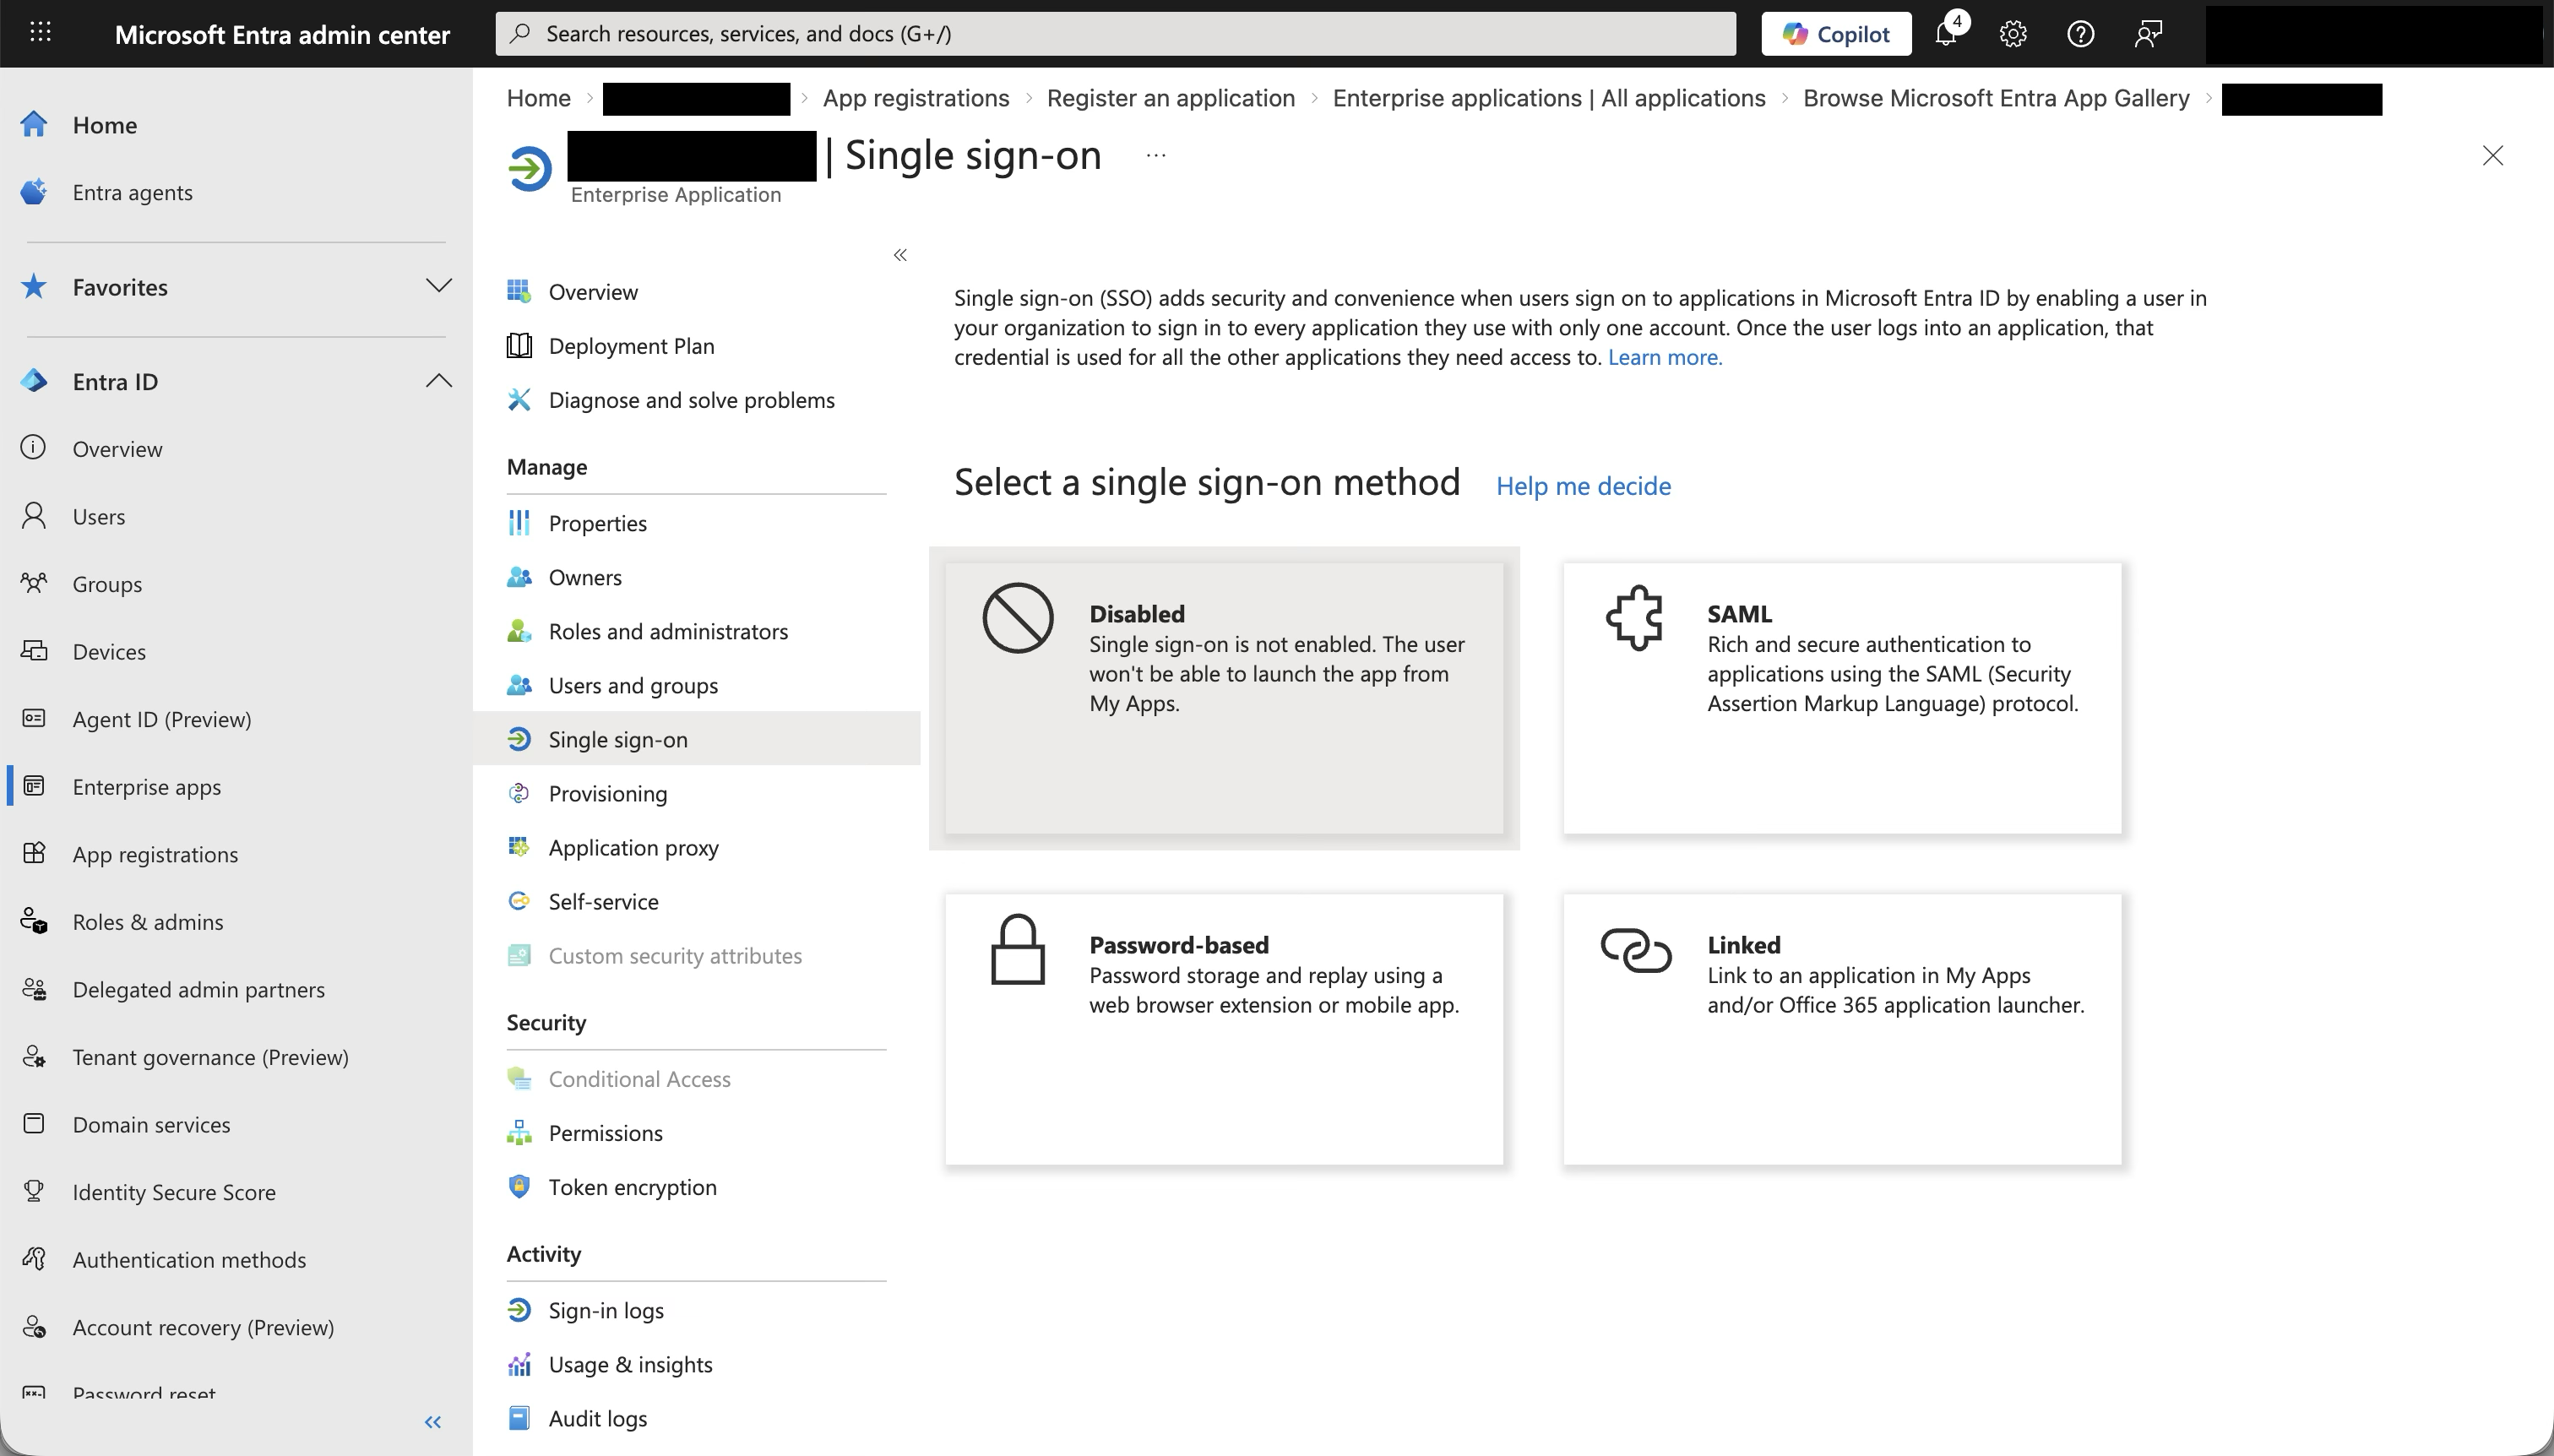
Step 3: Configure SAML in Entra ID
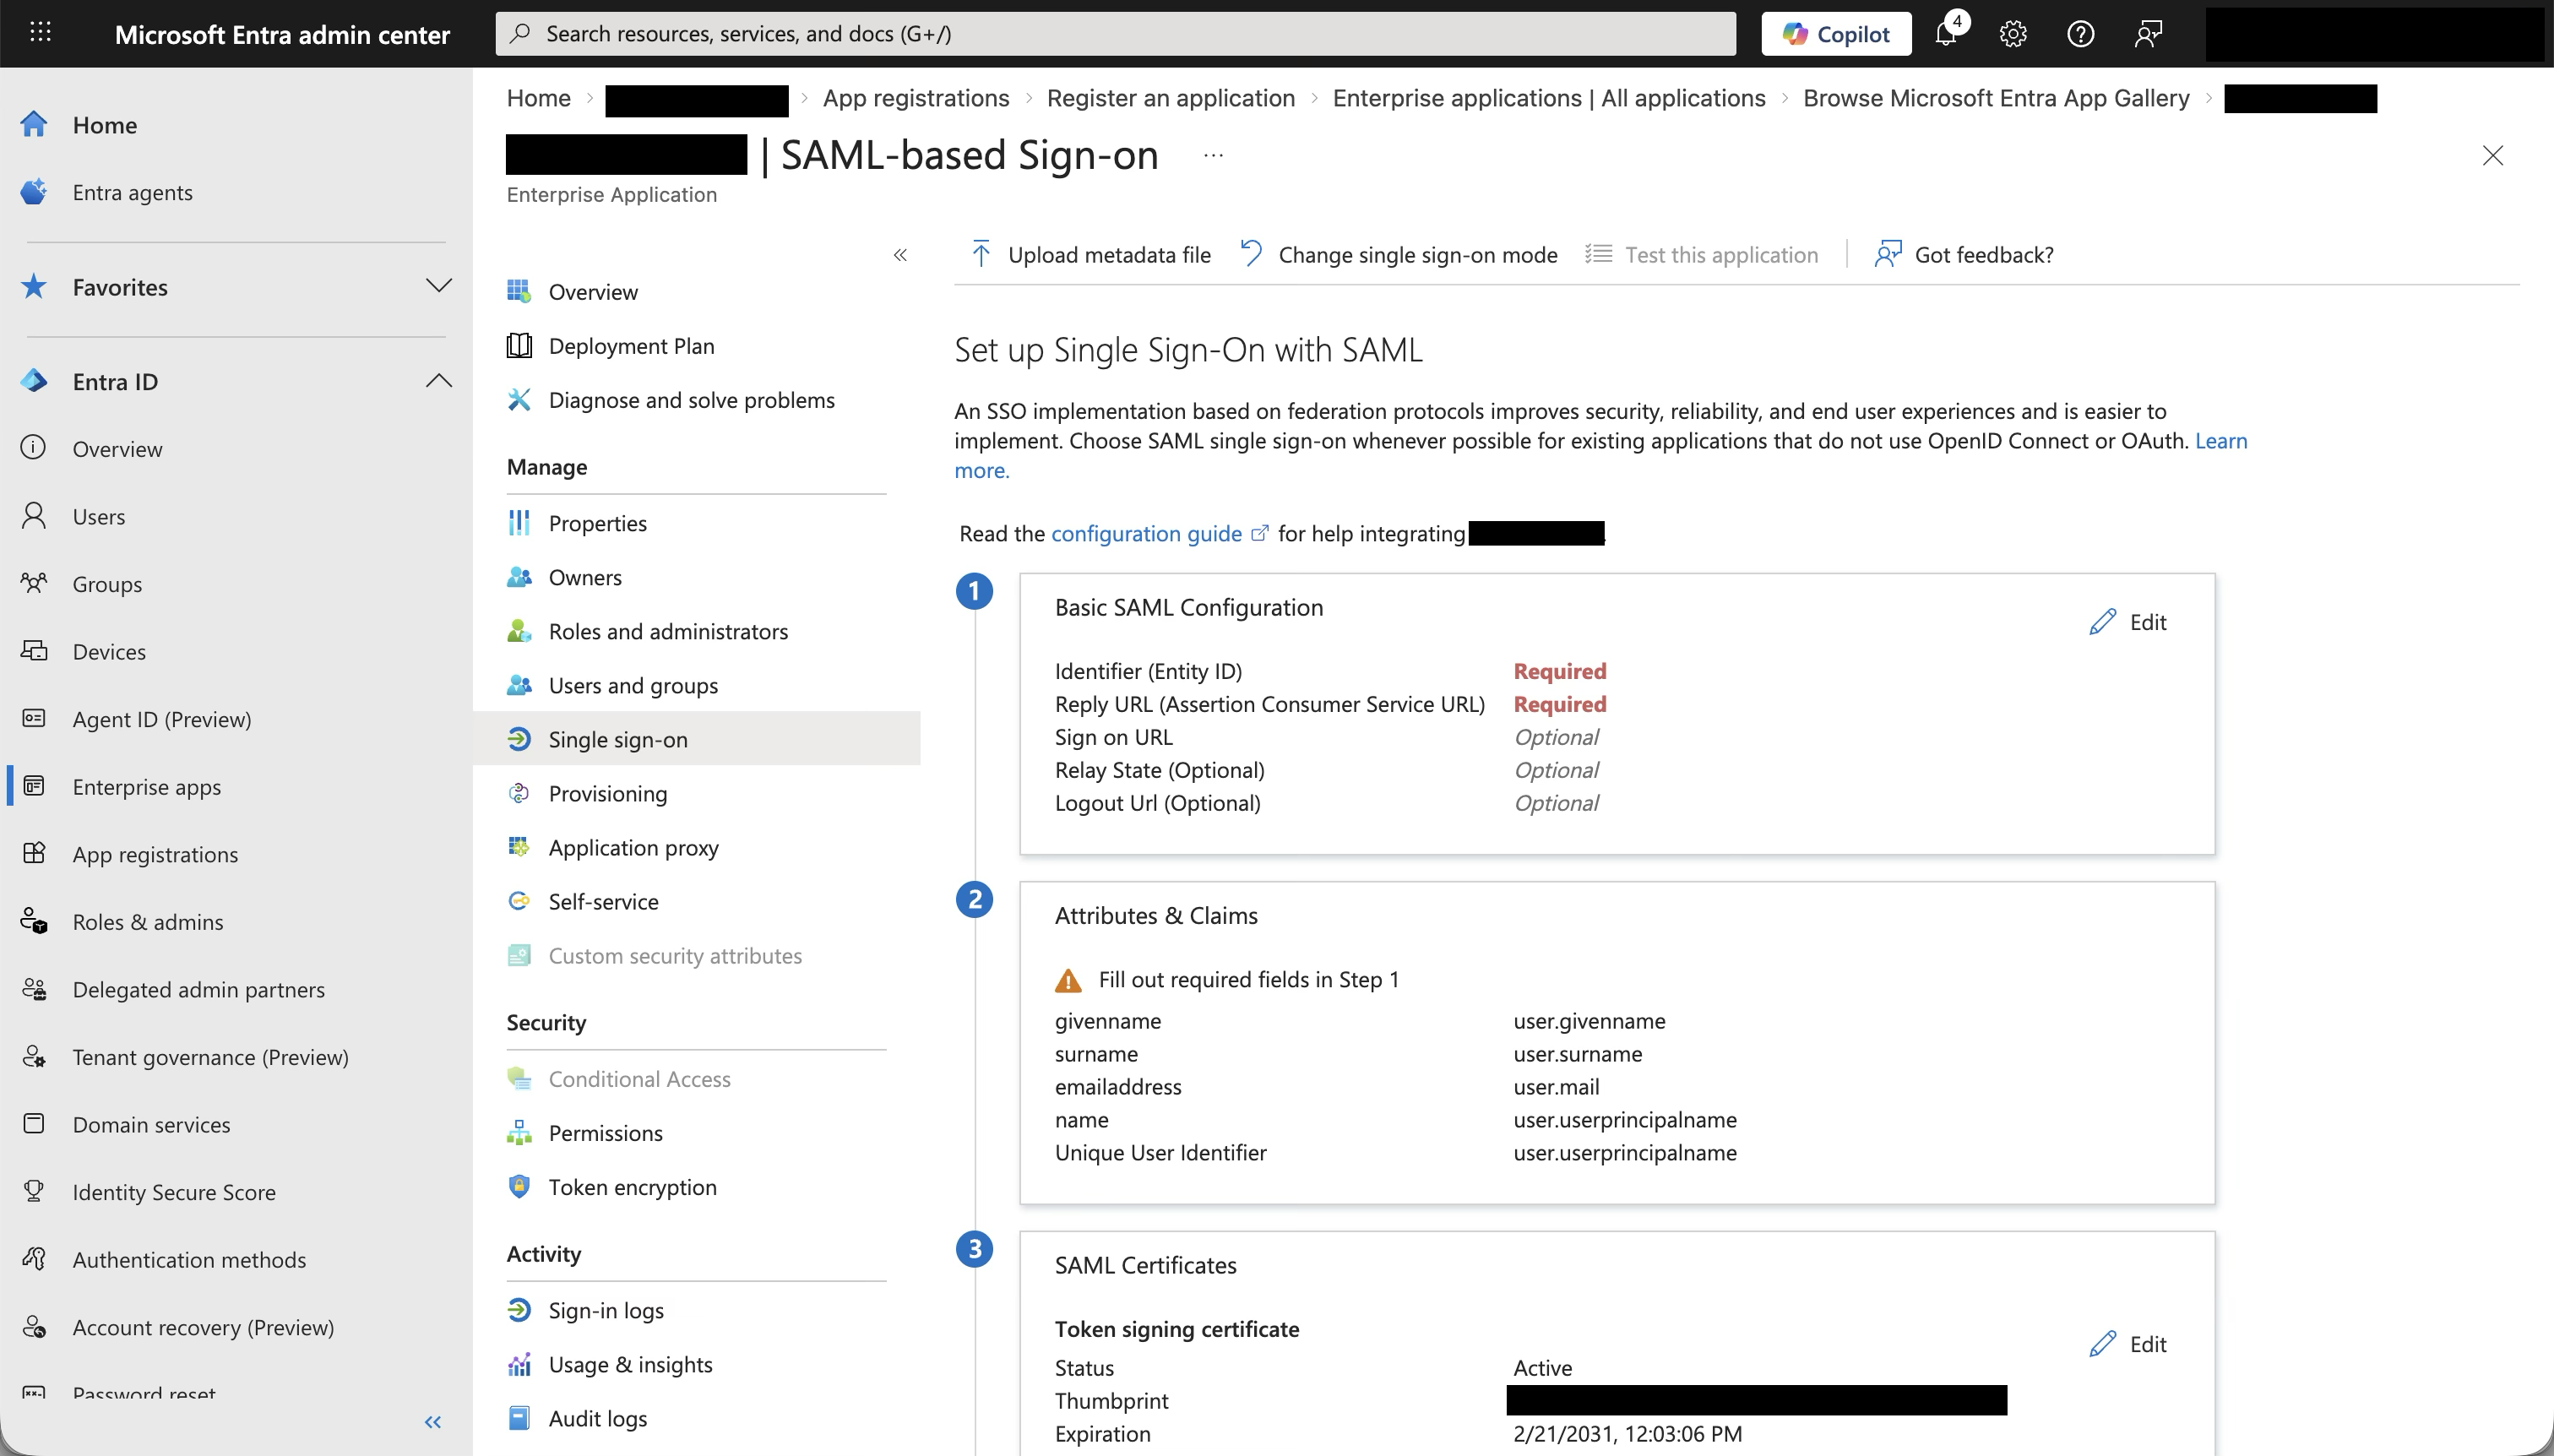
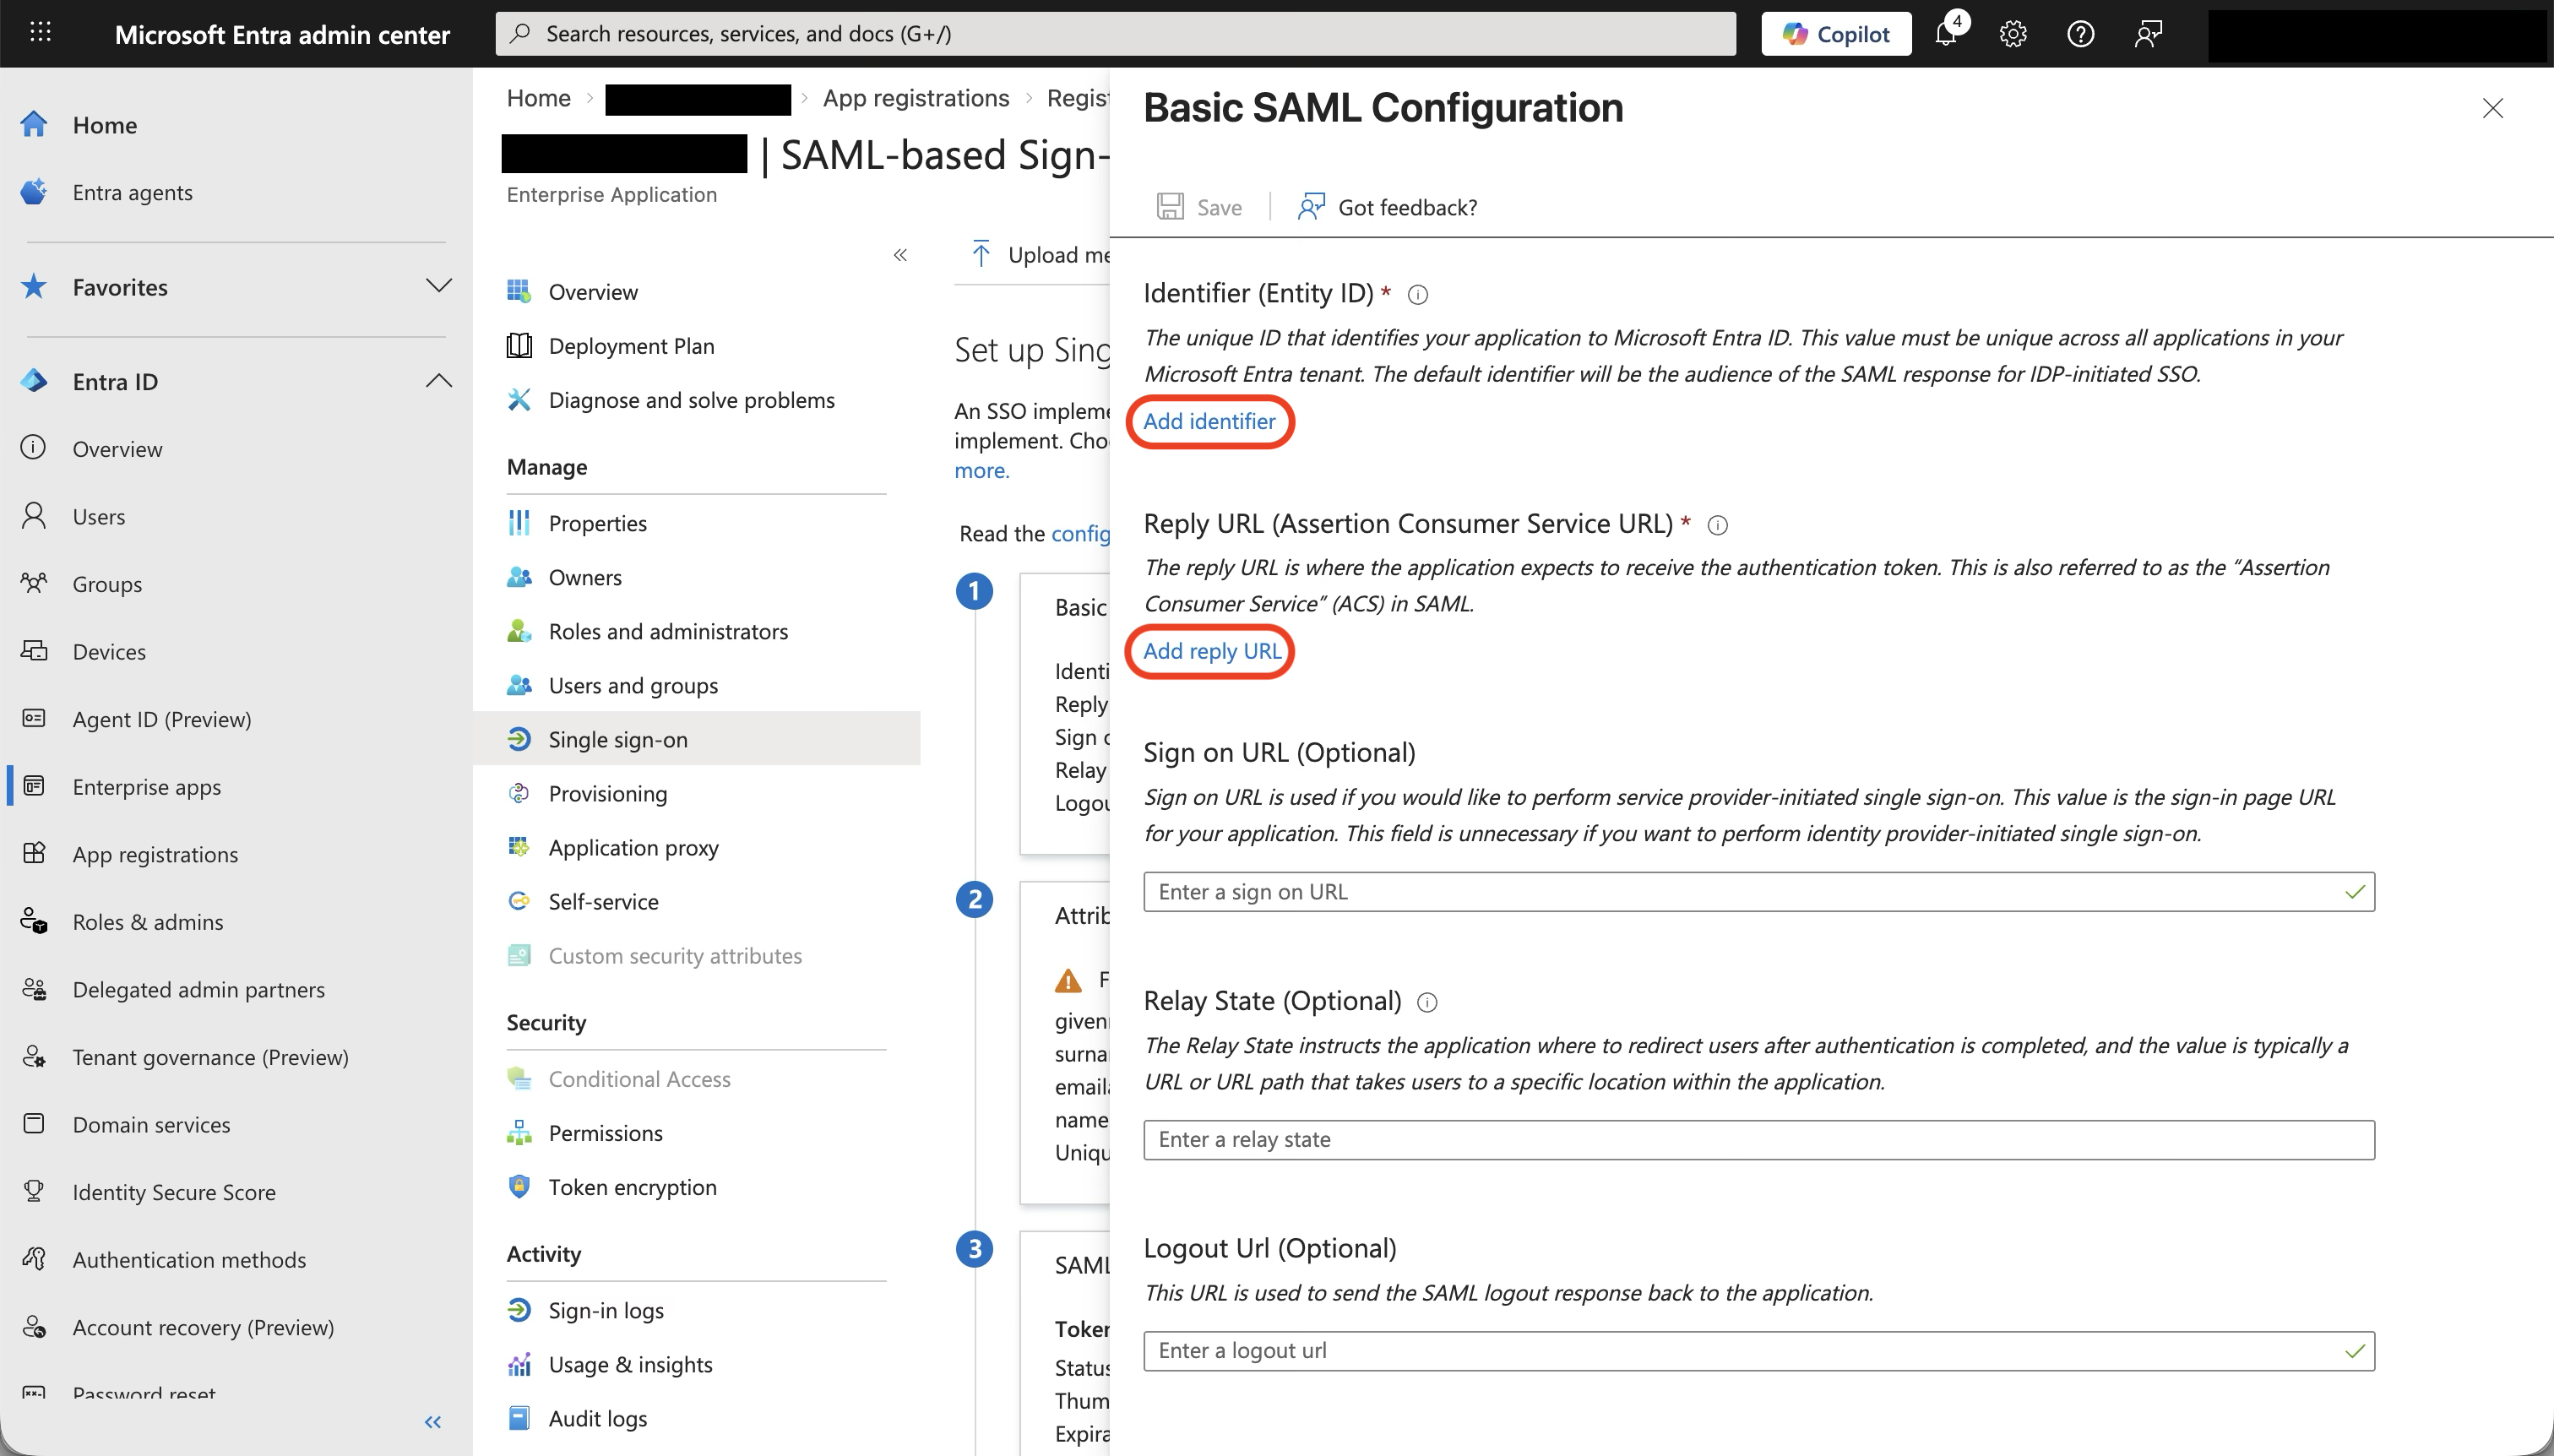
Basic SAML Configuration
Click Edit on the Basic SAML Configuration panel. A side panel opens.- Click Add identifier and paste the Issuer value from Jitera
- Click Add reply URL and paste the Assertion Consumer Service URL from Jitera
- Leave Sign on URL, Relay State, and Logout Url empty
- Click Save at the top of the panel
| Entra ID field | Paste value from Jitera | Example |
|---|---|---|
| Identifier (Entity ID) | Issuer | https://api.jitera.app/saml_sso/a1b2c3d4-e5f6-7890-abcd-ef1234567890 |
| Reply URL (Assertion Consumer Service URL) | Assertion Consumer Service URL | https://api.jitera.app/users/saml/auth |
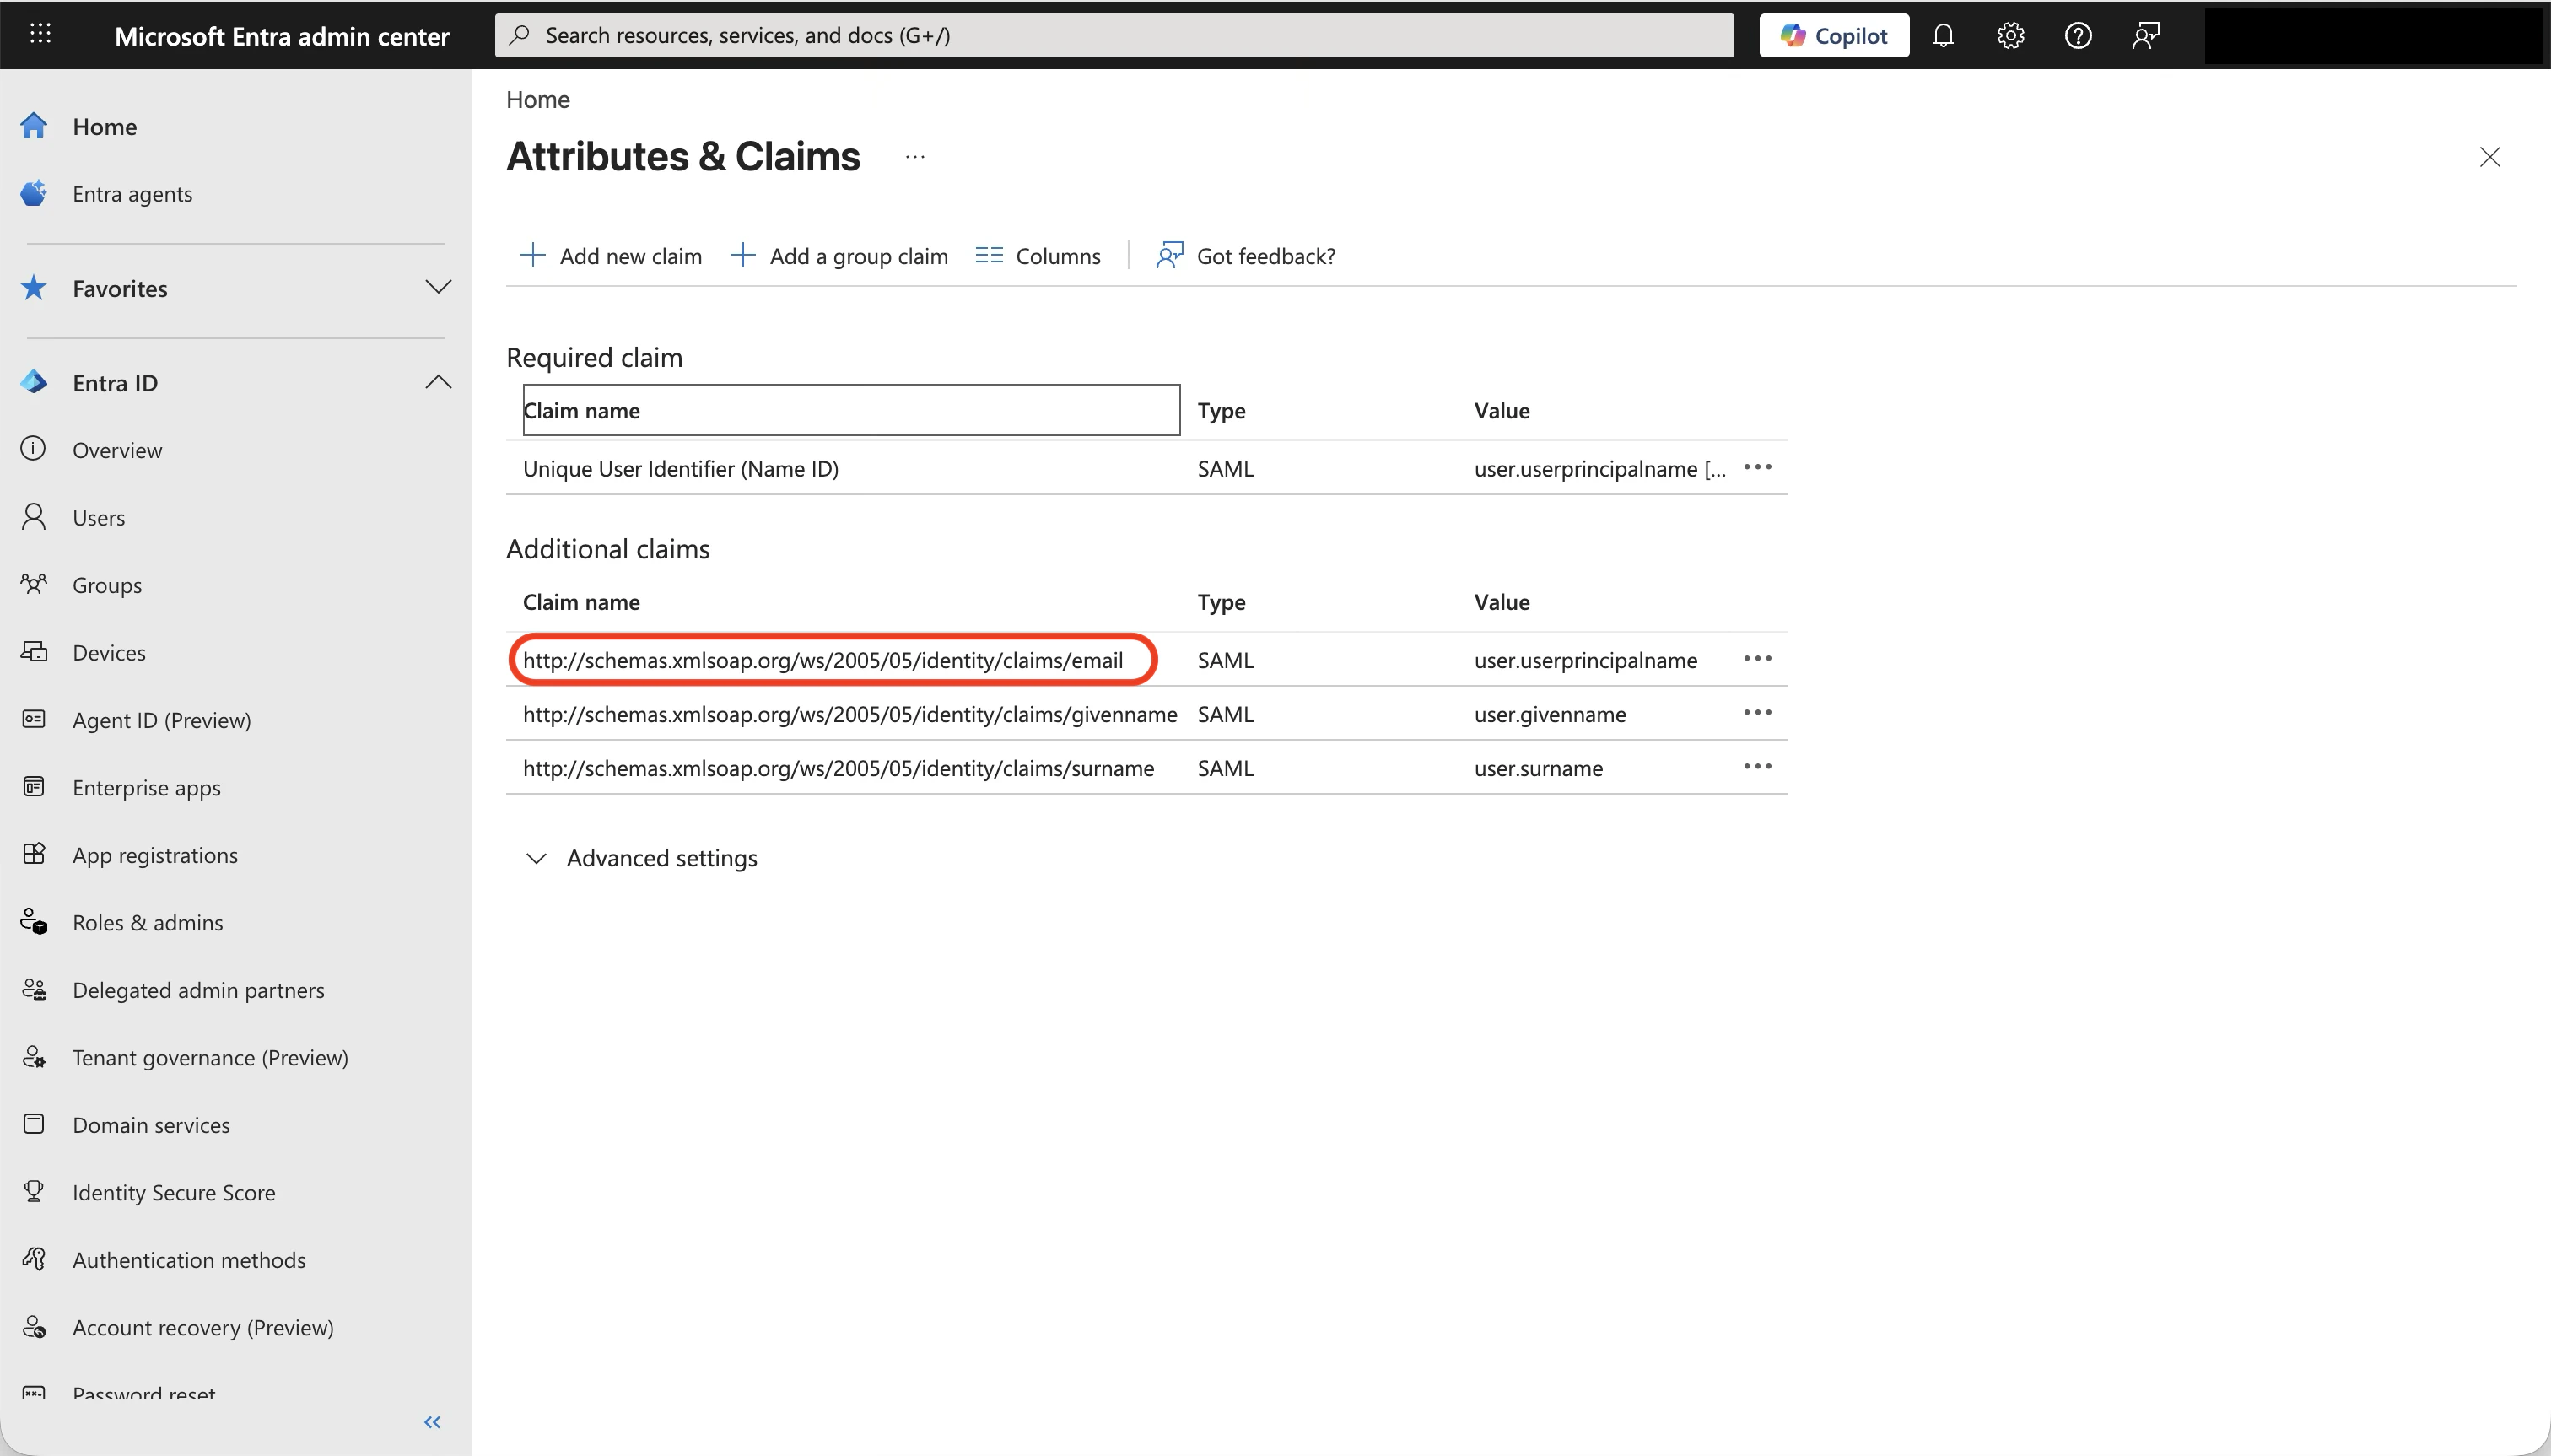
Attributes & Claims
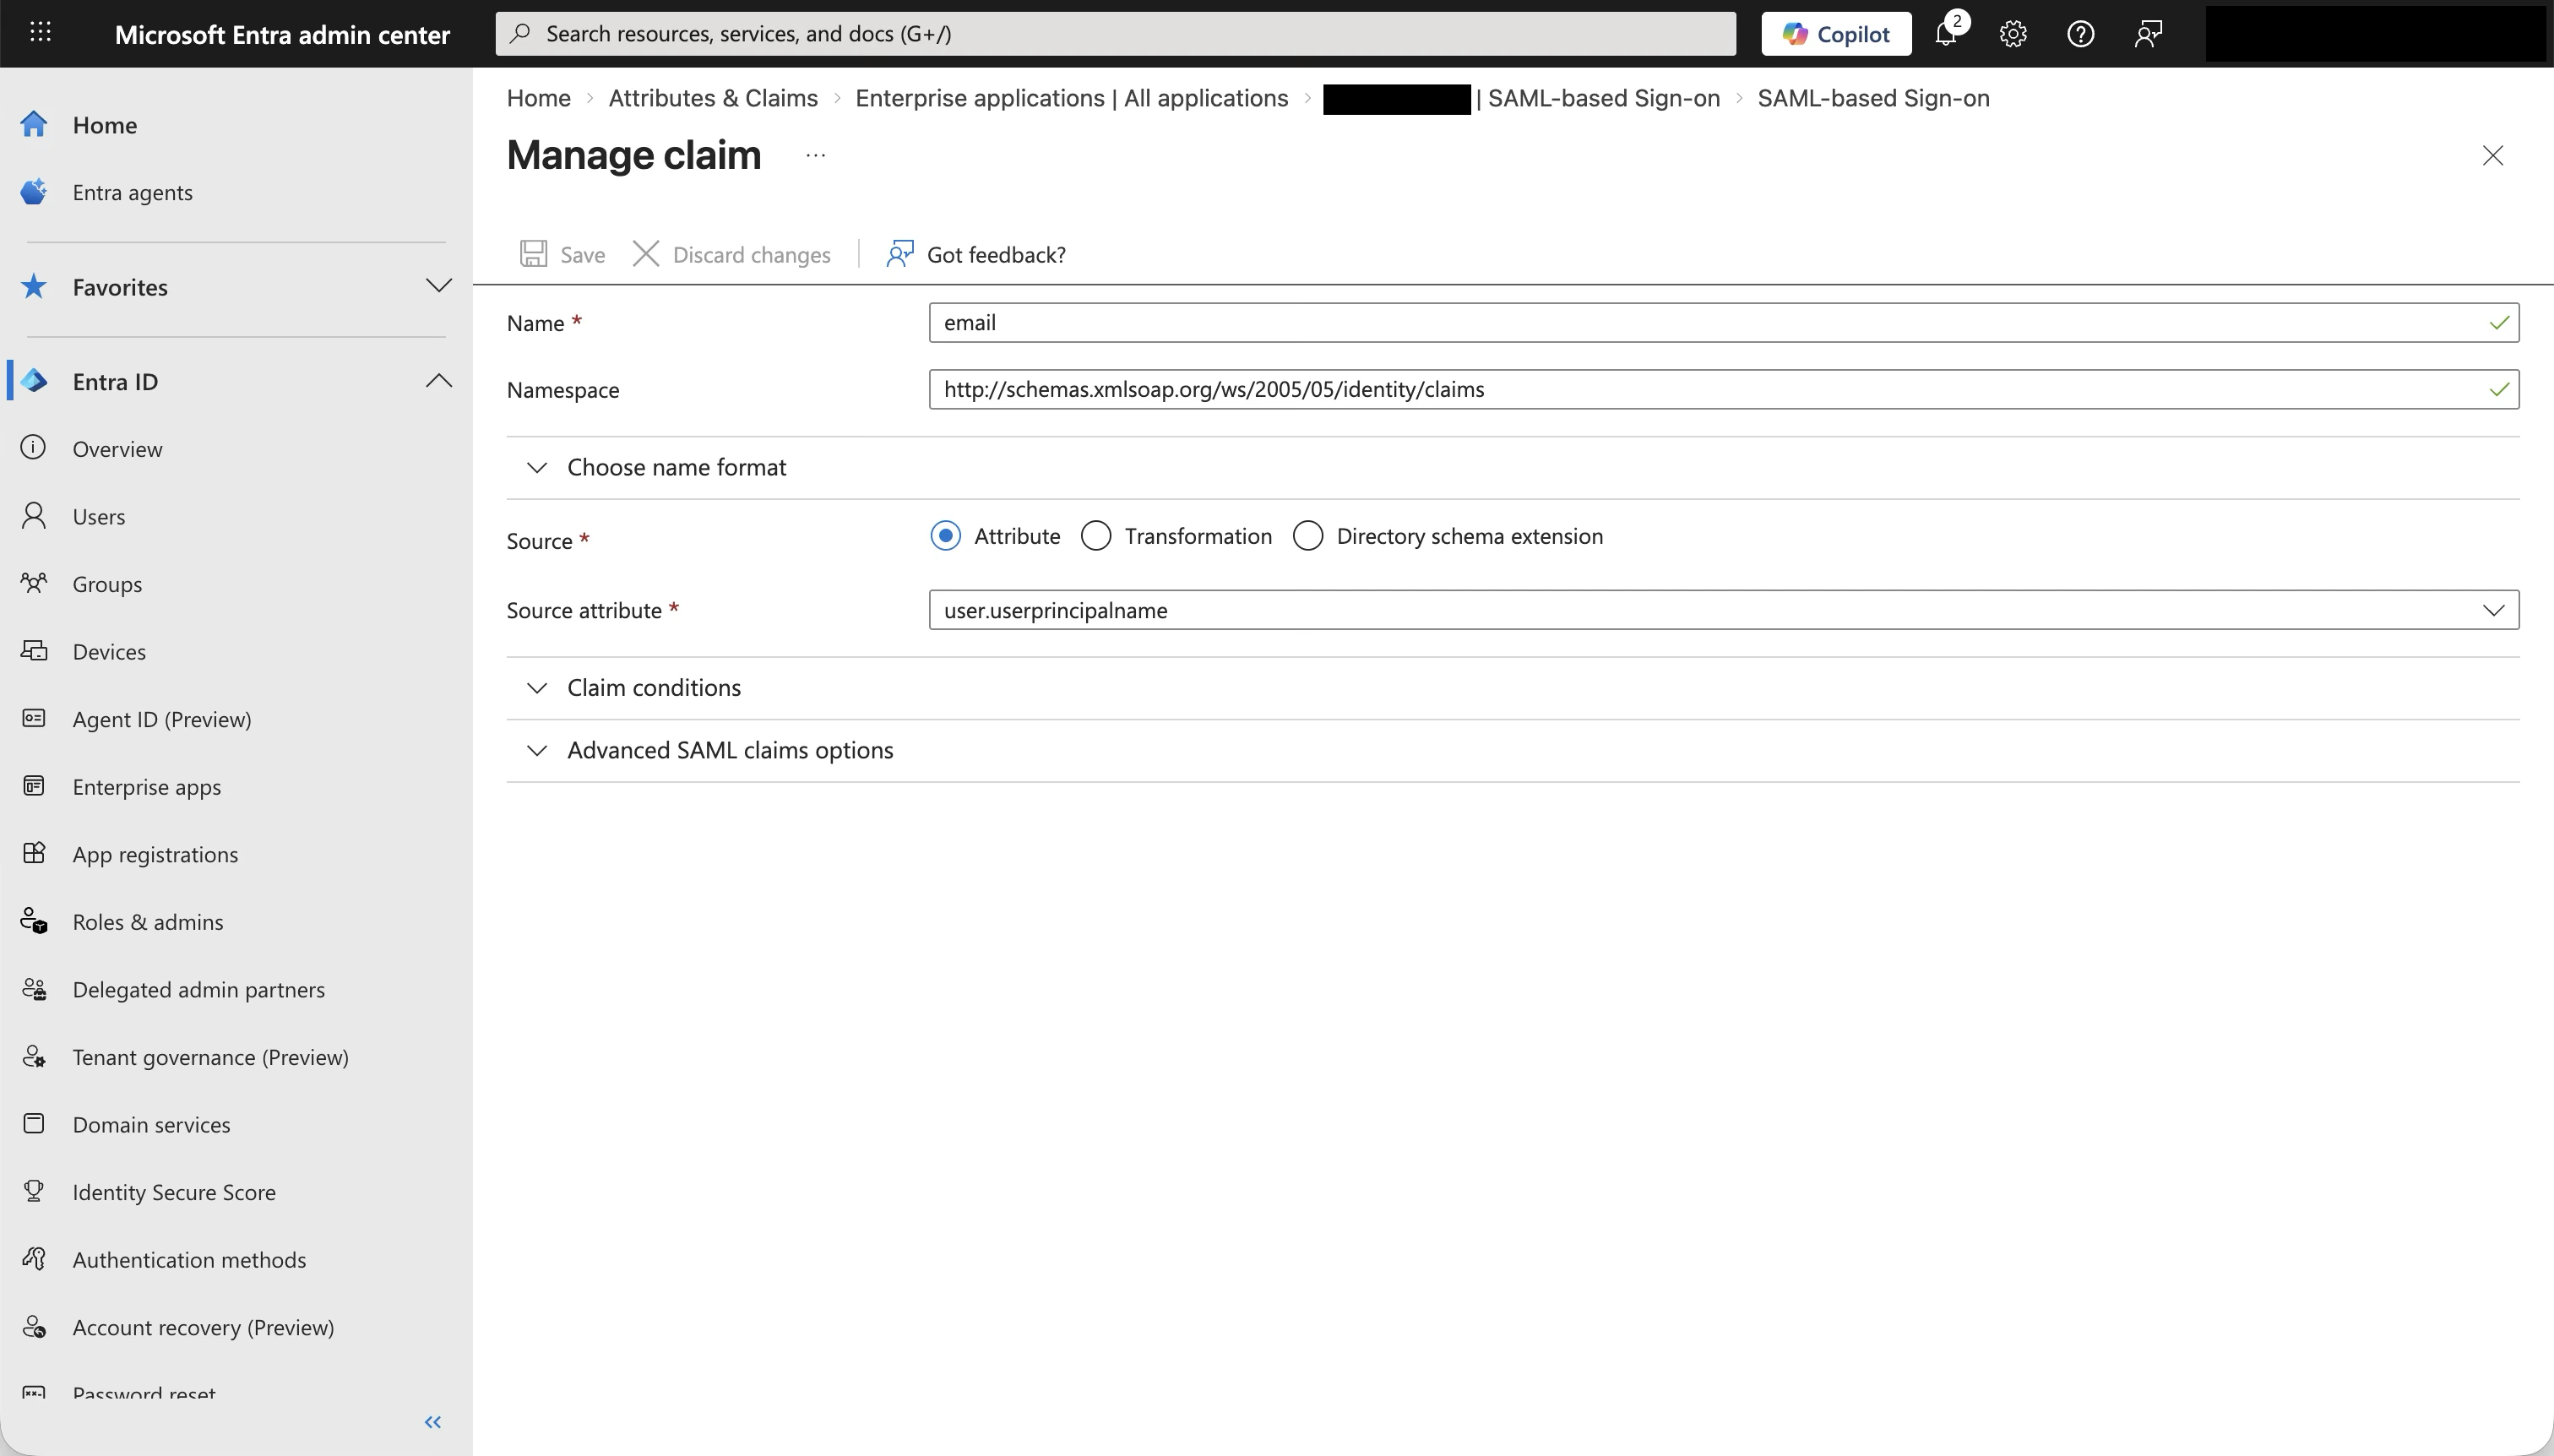
Entra ID sends user attributes in the SAML assertion. Jitera needs three: email, first name, and last name. The default Entra ID claims already include these. Verify them by clicking Edit on the Attributes & Claims panel. Required claim:| Claim name | Default value |
|---|---|
| Unique User Identifier (Name ID) | user.userprincipalname |
| Claim name | Default value | Maps to Jitera field |
|---|---|---|
http://schemas.xmlsoap.org/ws/2005/05/identity/claims/email | user.userprincipalname | |
http://schemas.xmlsoap.org/ws/2005/05/identity/claims/givenname | user.givenname | First name |
http://schemas.xmlsoap.org/ws/2005/05/identity/claims/surname | user.surname | Last name |
Copy the metadata URL
Scroll down to section 3 - SAML Certificates on the same page. Copy the App Federation Metadata Url. It looks like this: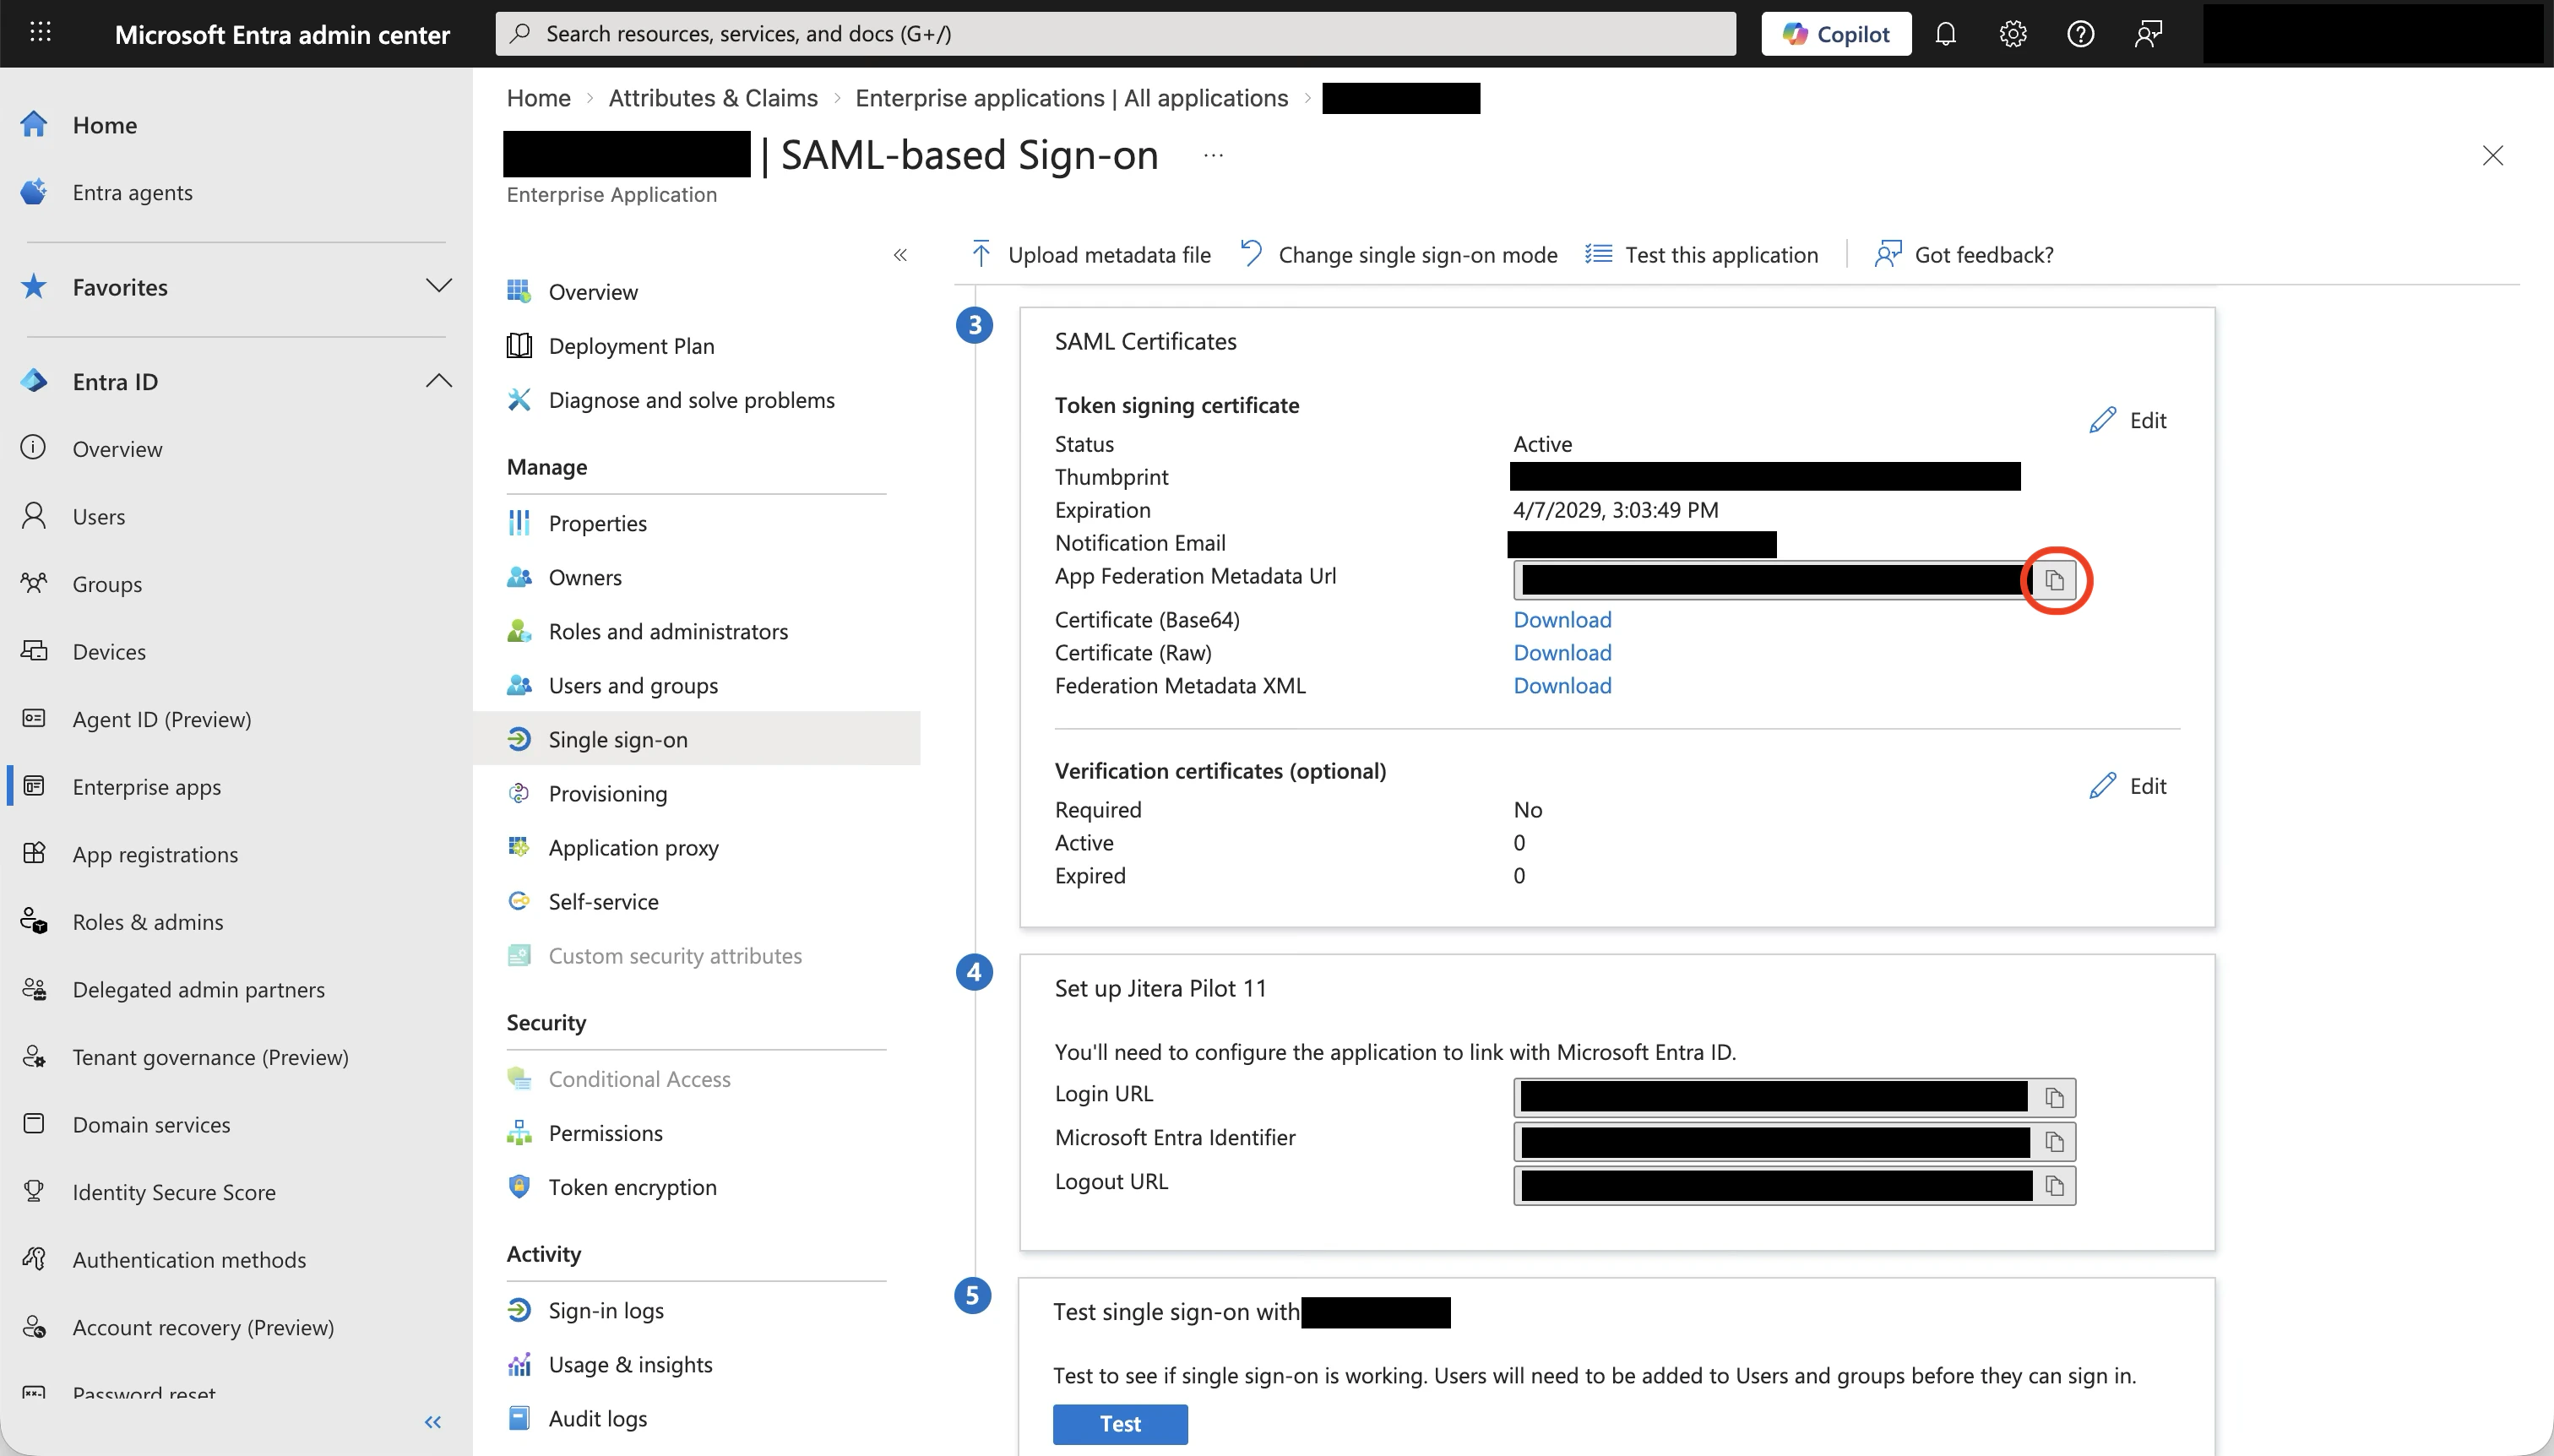
Step 4: Configure SSO in Jitera
Go back to the Jitera SSO dialog you opened in Step 1.Paste the metadata URL
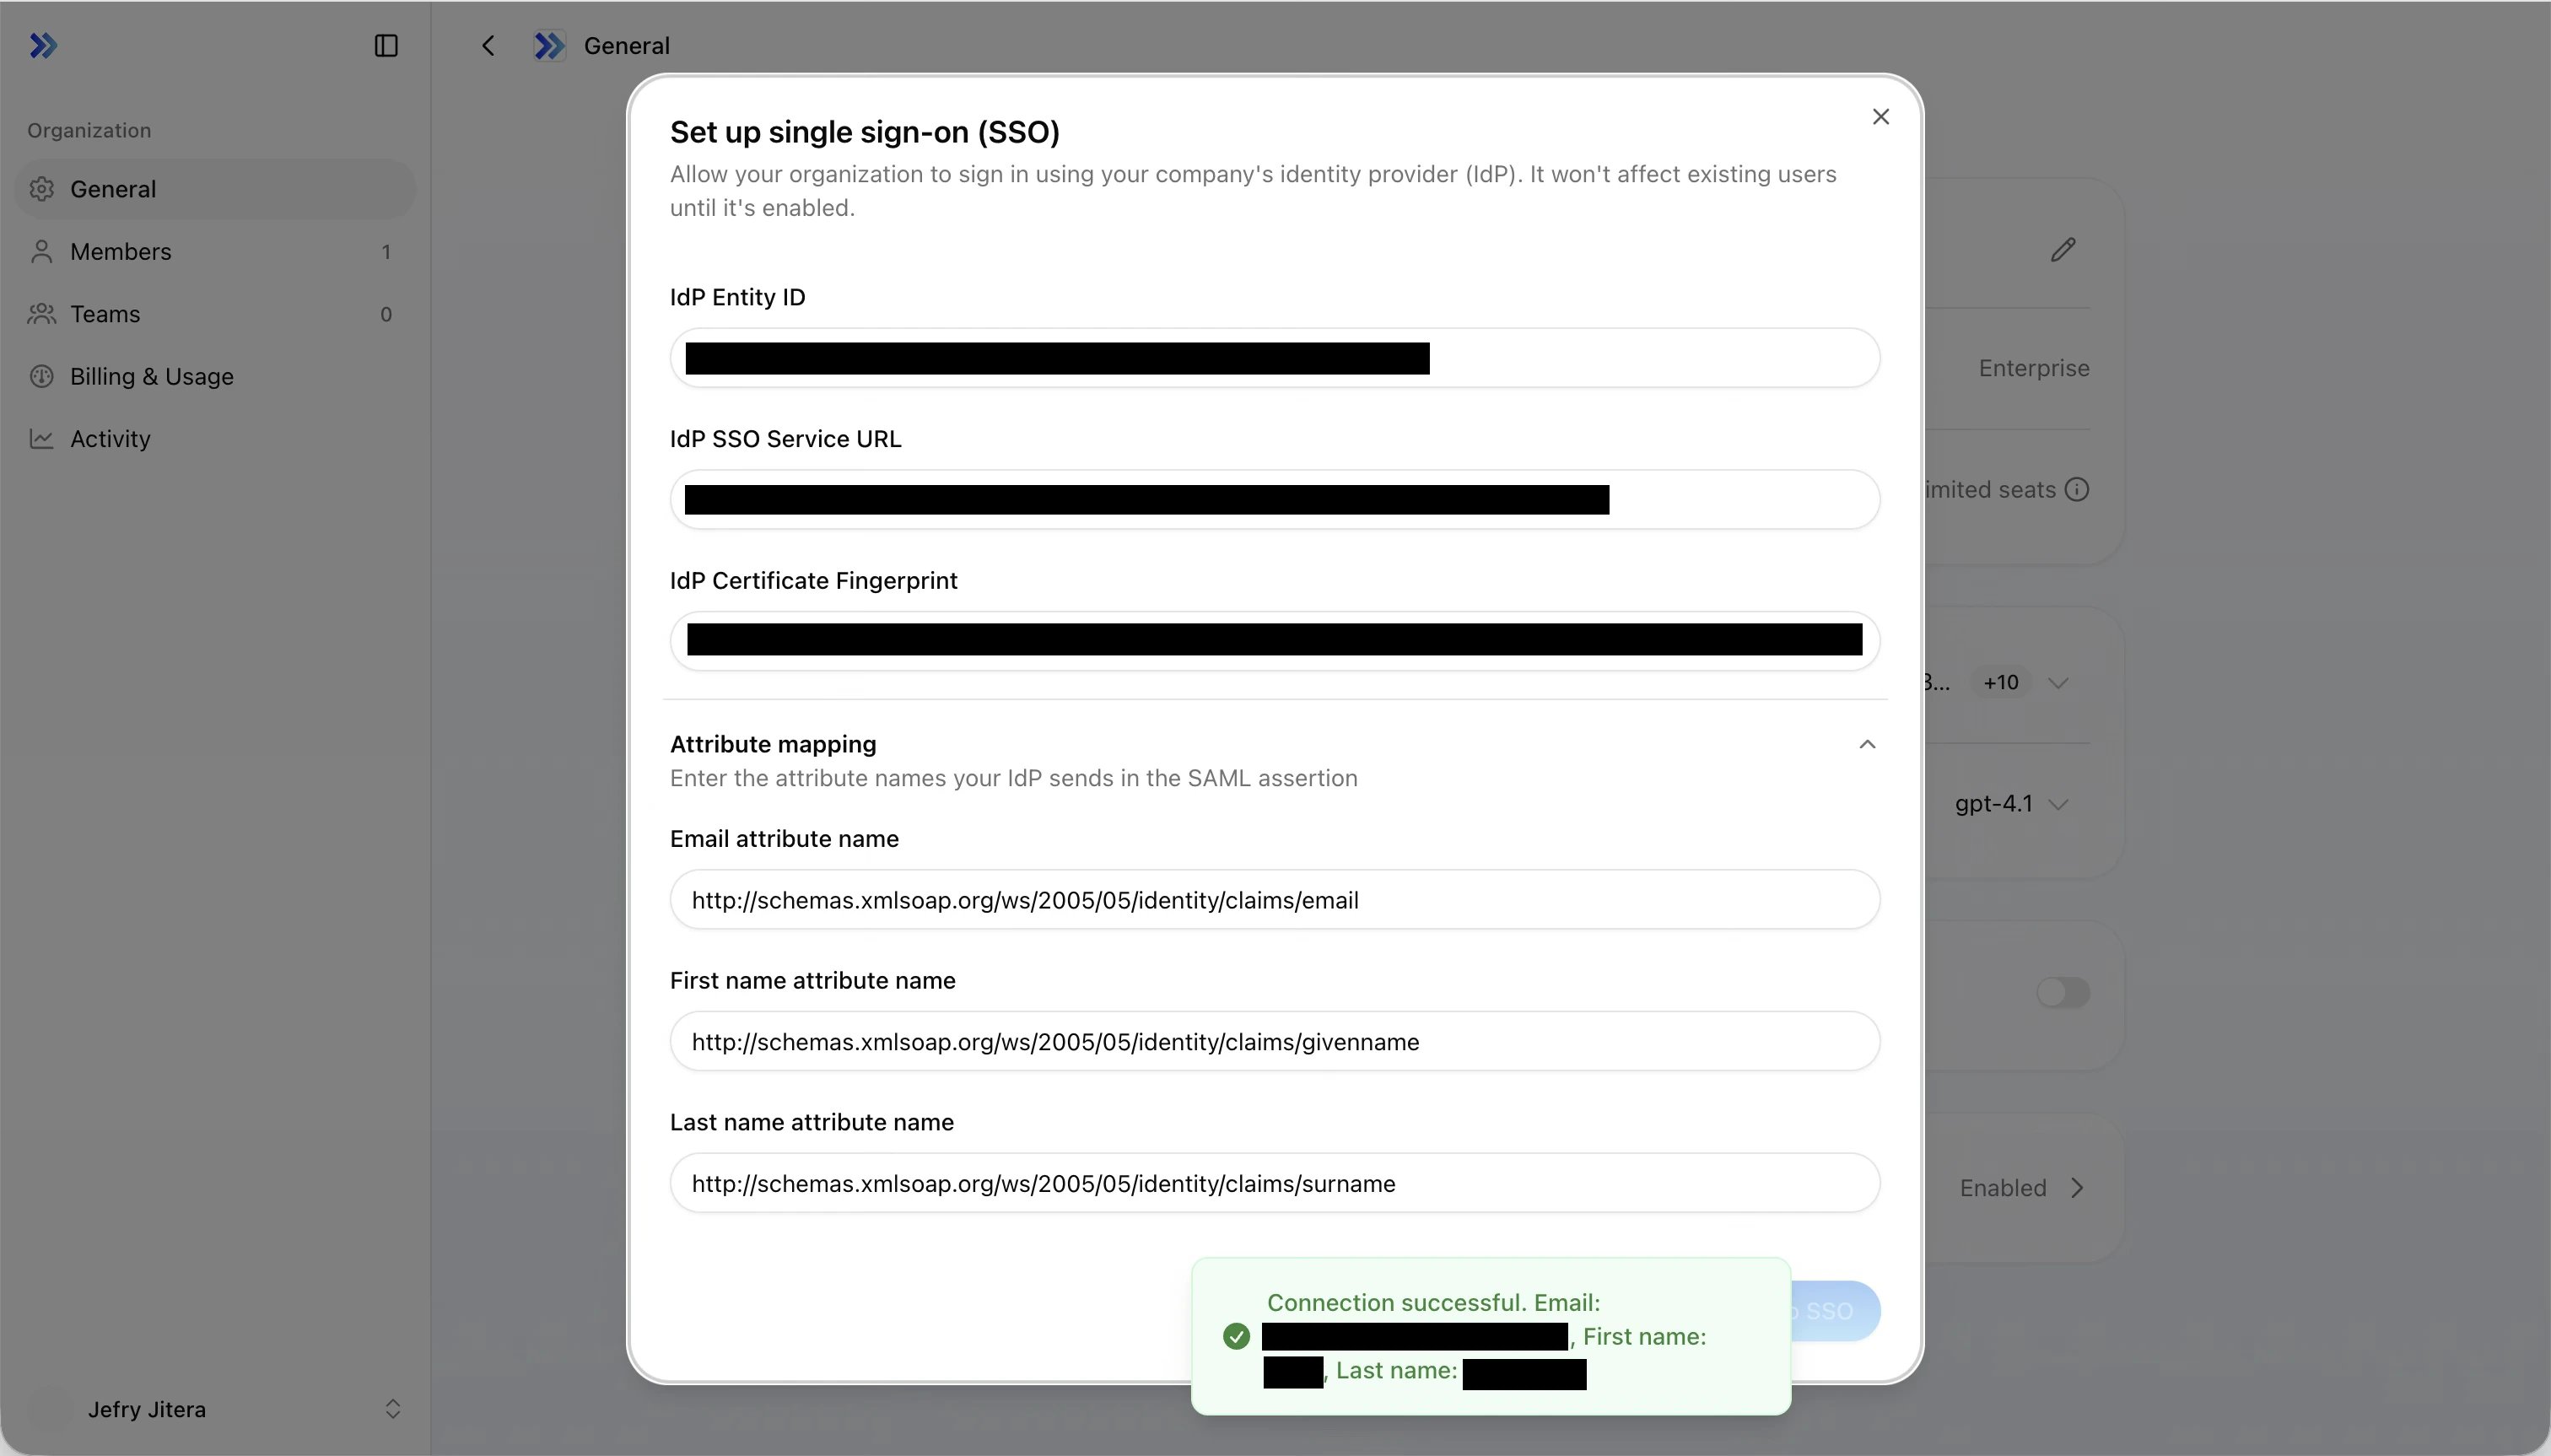
Select the Metadata URL tab, paste the App Federation Metadata Url you copied from Entra ID, and click Fetch.The IdP Entity ID, IdP SSO Service URL, and IdP Certificate Fingerprint fields auto-fill. The parsed certificate’s expiry date is displayed below the fingerprint and is color-coded — amber when 30 days or fewer remain, red when 7 days or fewer remain or the certificate has already expired.
Enter email domains
In the Email domains field, enter the domains you want to enforce SSO for, separated by commas.Example:
example.com, corp.example.comUsers with these email domains will be required to sign in through Entra ID.Set attribute mapping
Update the attribute names to match the Entra ID claim names.
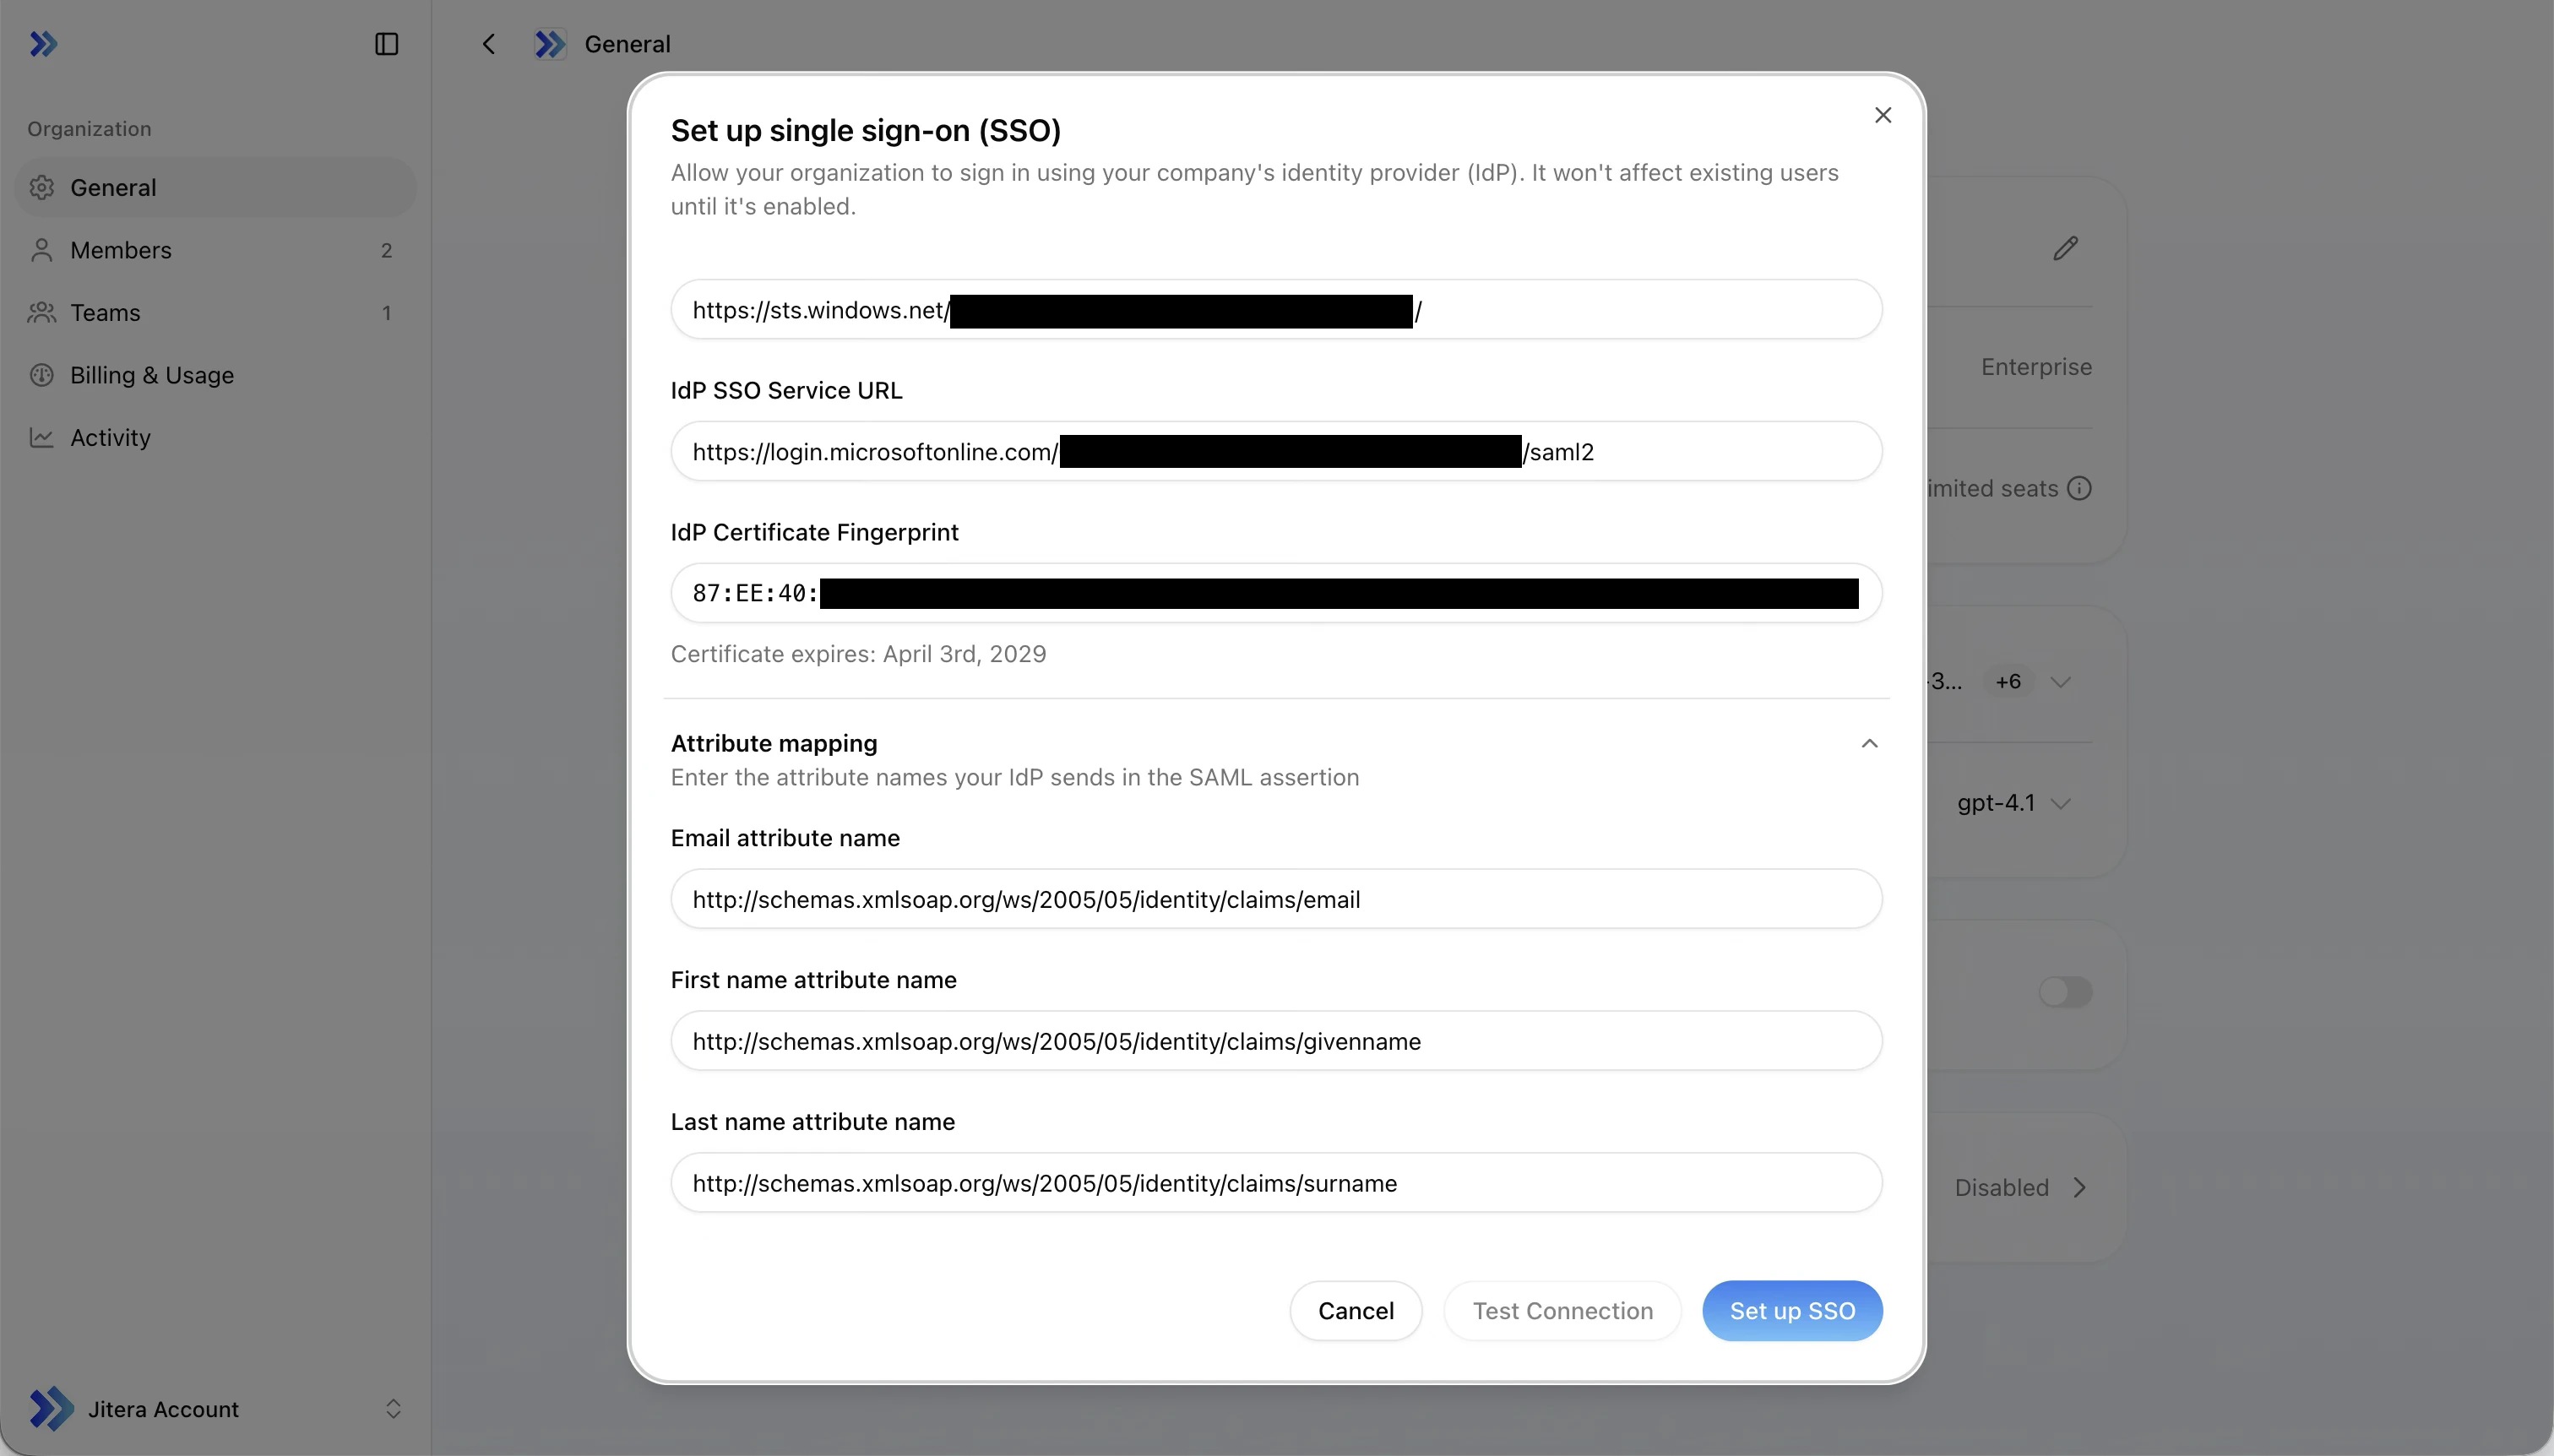
| Jitera field | Set to |
|---|---|
| Email attribute name | http://schemas.xmlsoap.org/ws/2005/05/identity/claims/email |
| First name attribute name | http://schemas.xmlsoap.org/ws/2005/05/identity/claims/givenname |
| Last name attribute name | http://schemas.xmlsoap.org/ws/2005/05/identity/claims/surname |
Step 5: Assign users in Entra ID
Before you can test or sign in, users must be assigned to the Jitera application in Entra ID.- In the Entra admin center, go to your Jitera enterprise application
- Click Users and groups in the left sidebar
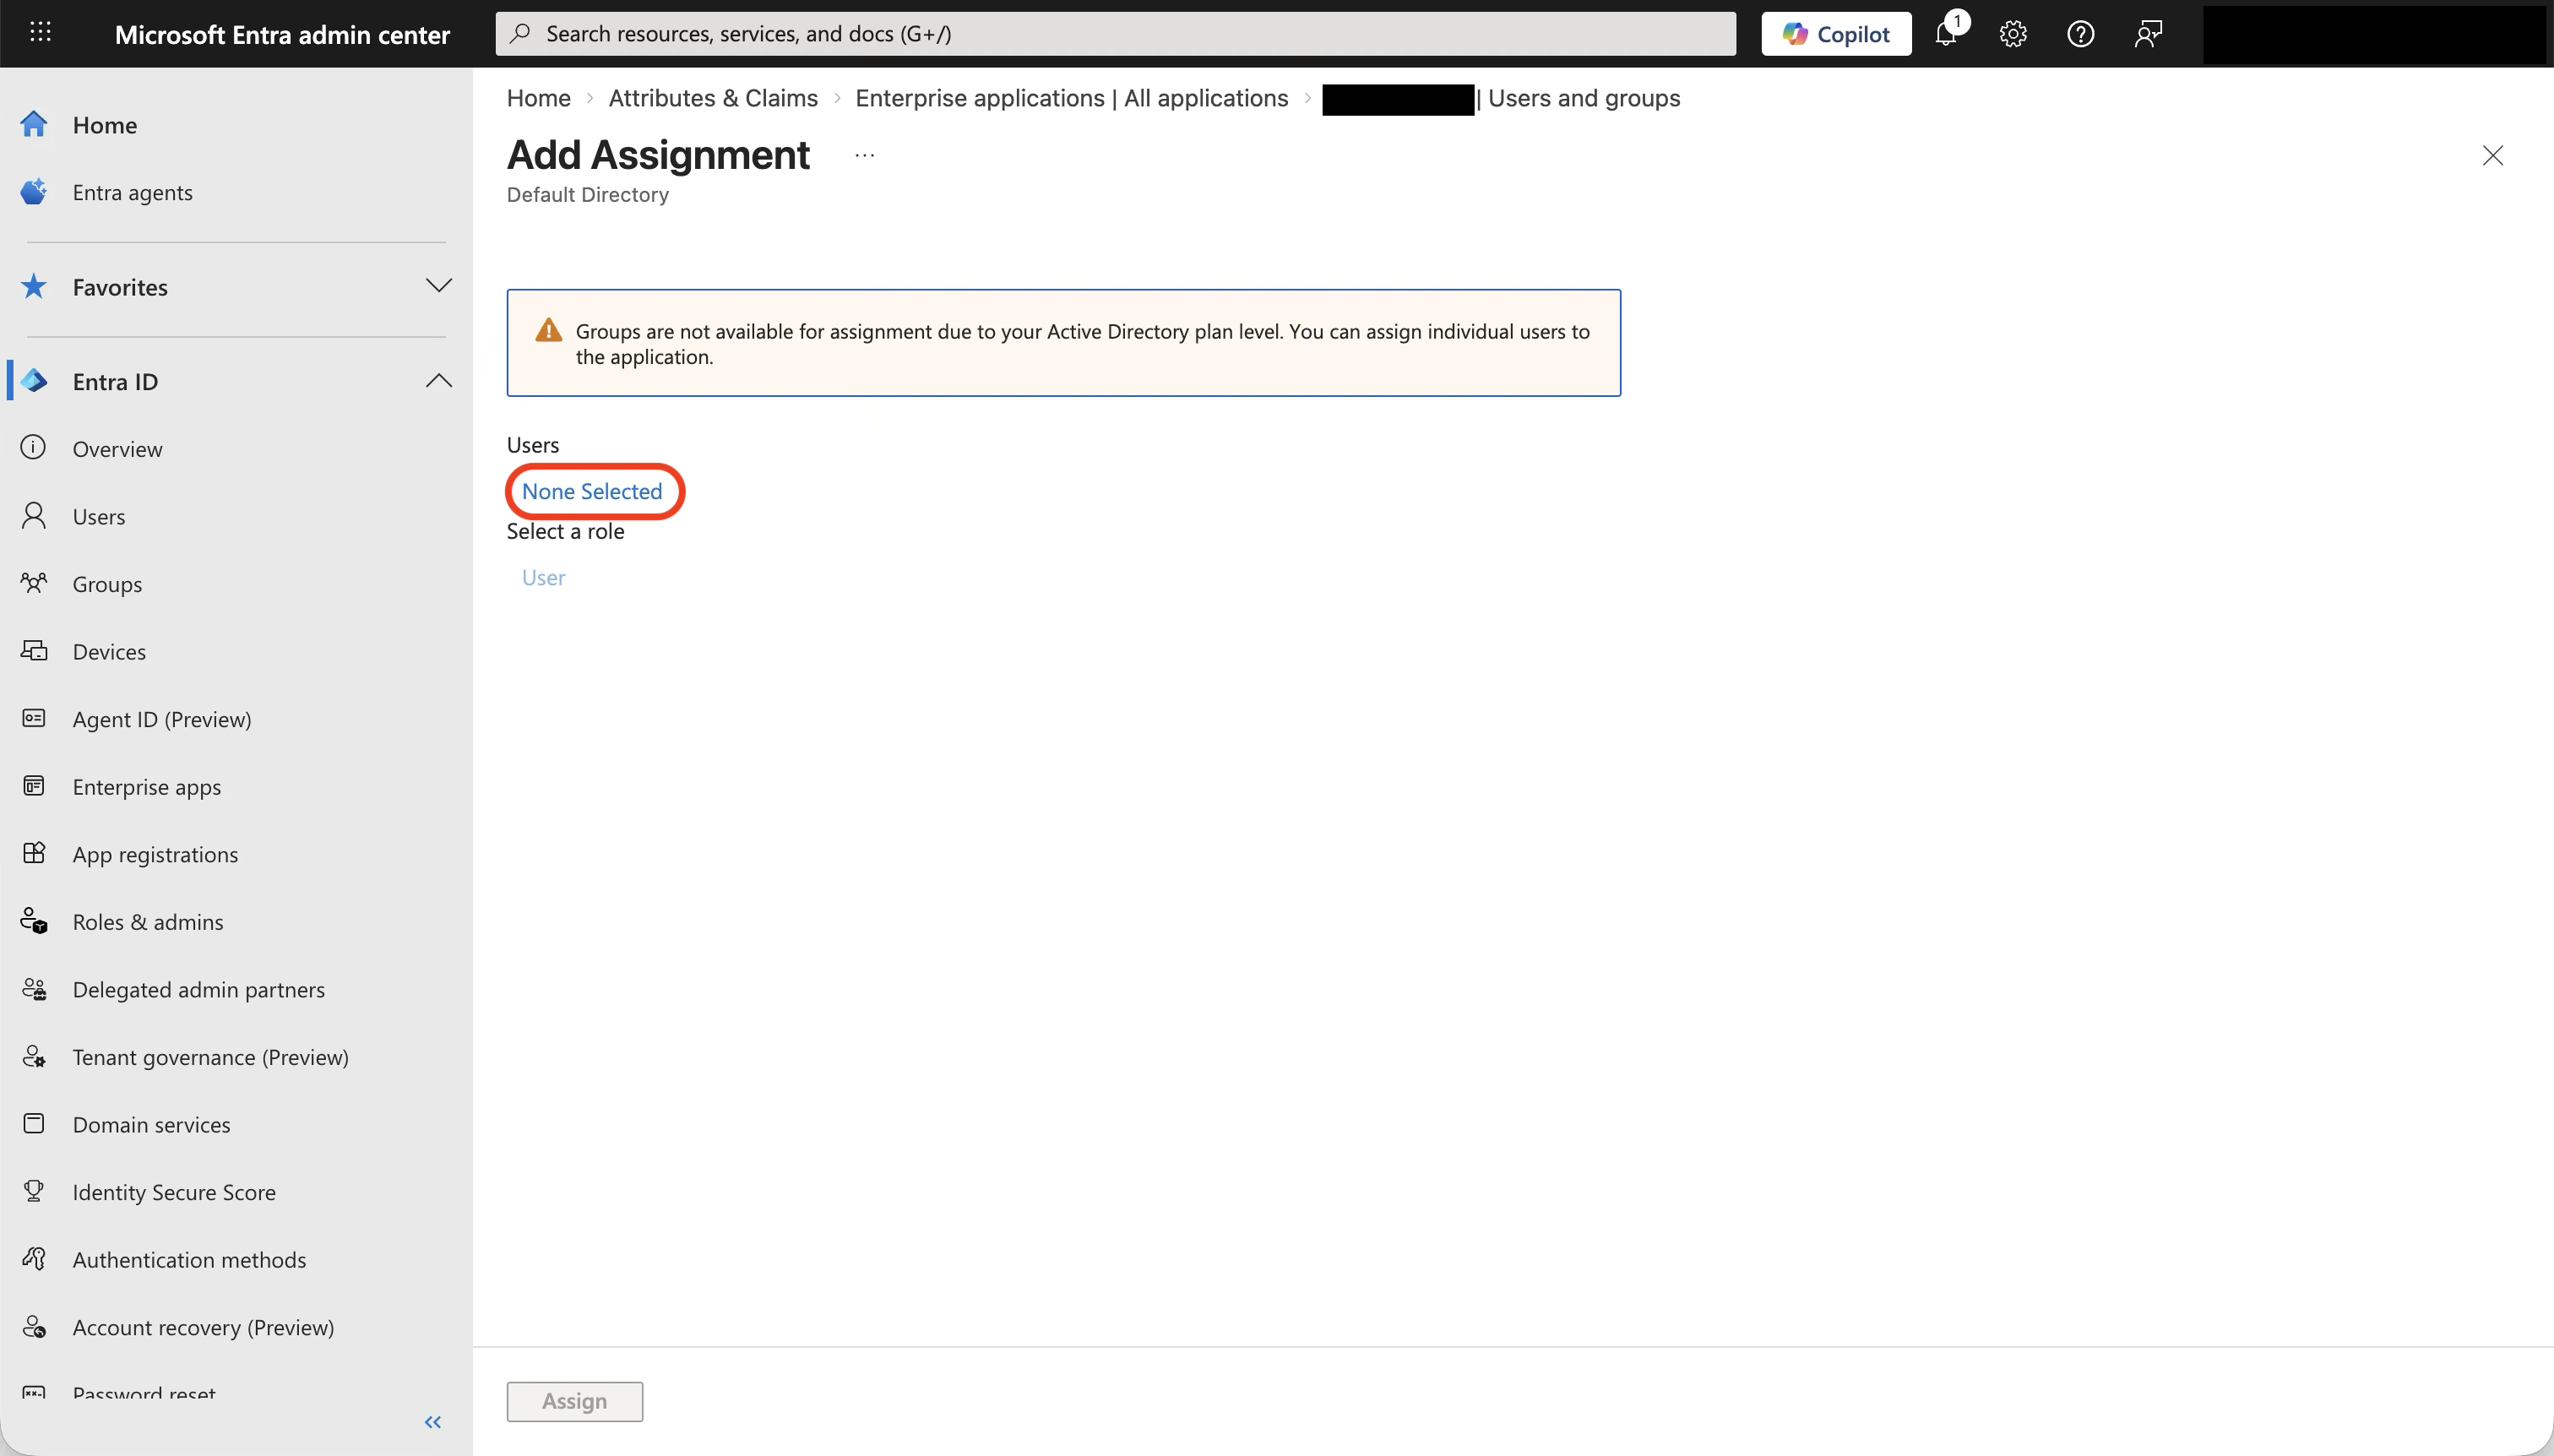
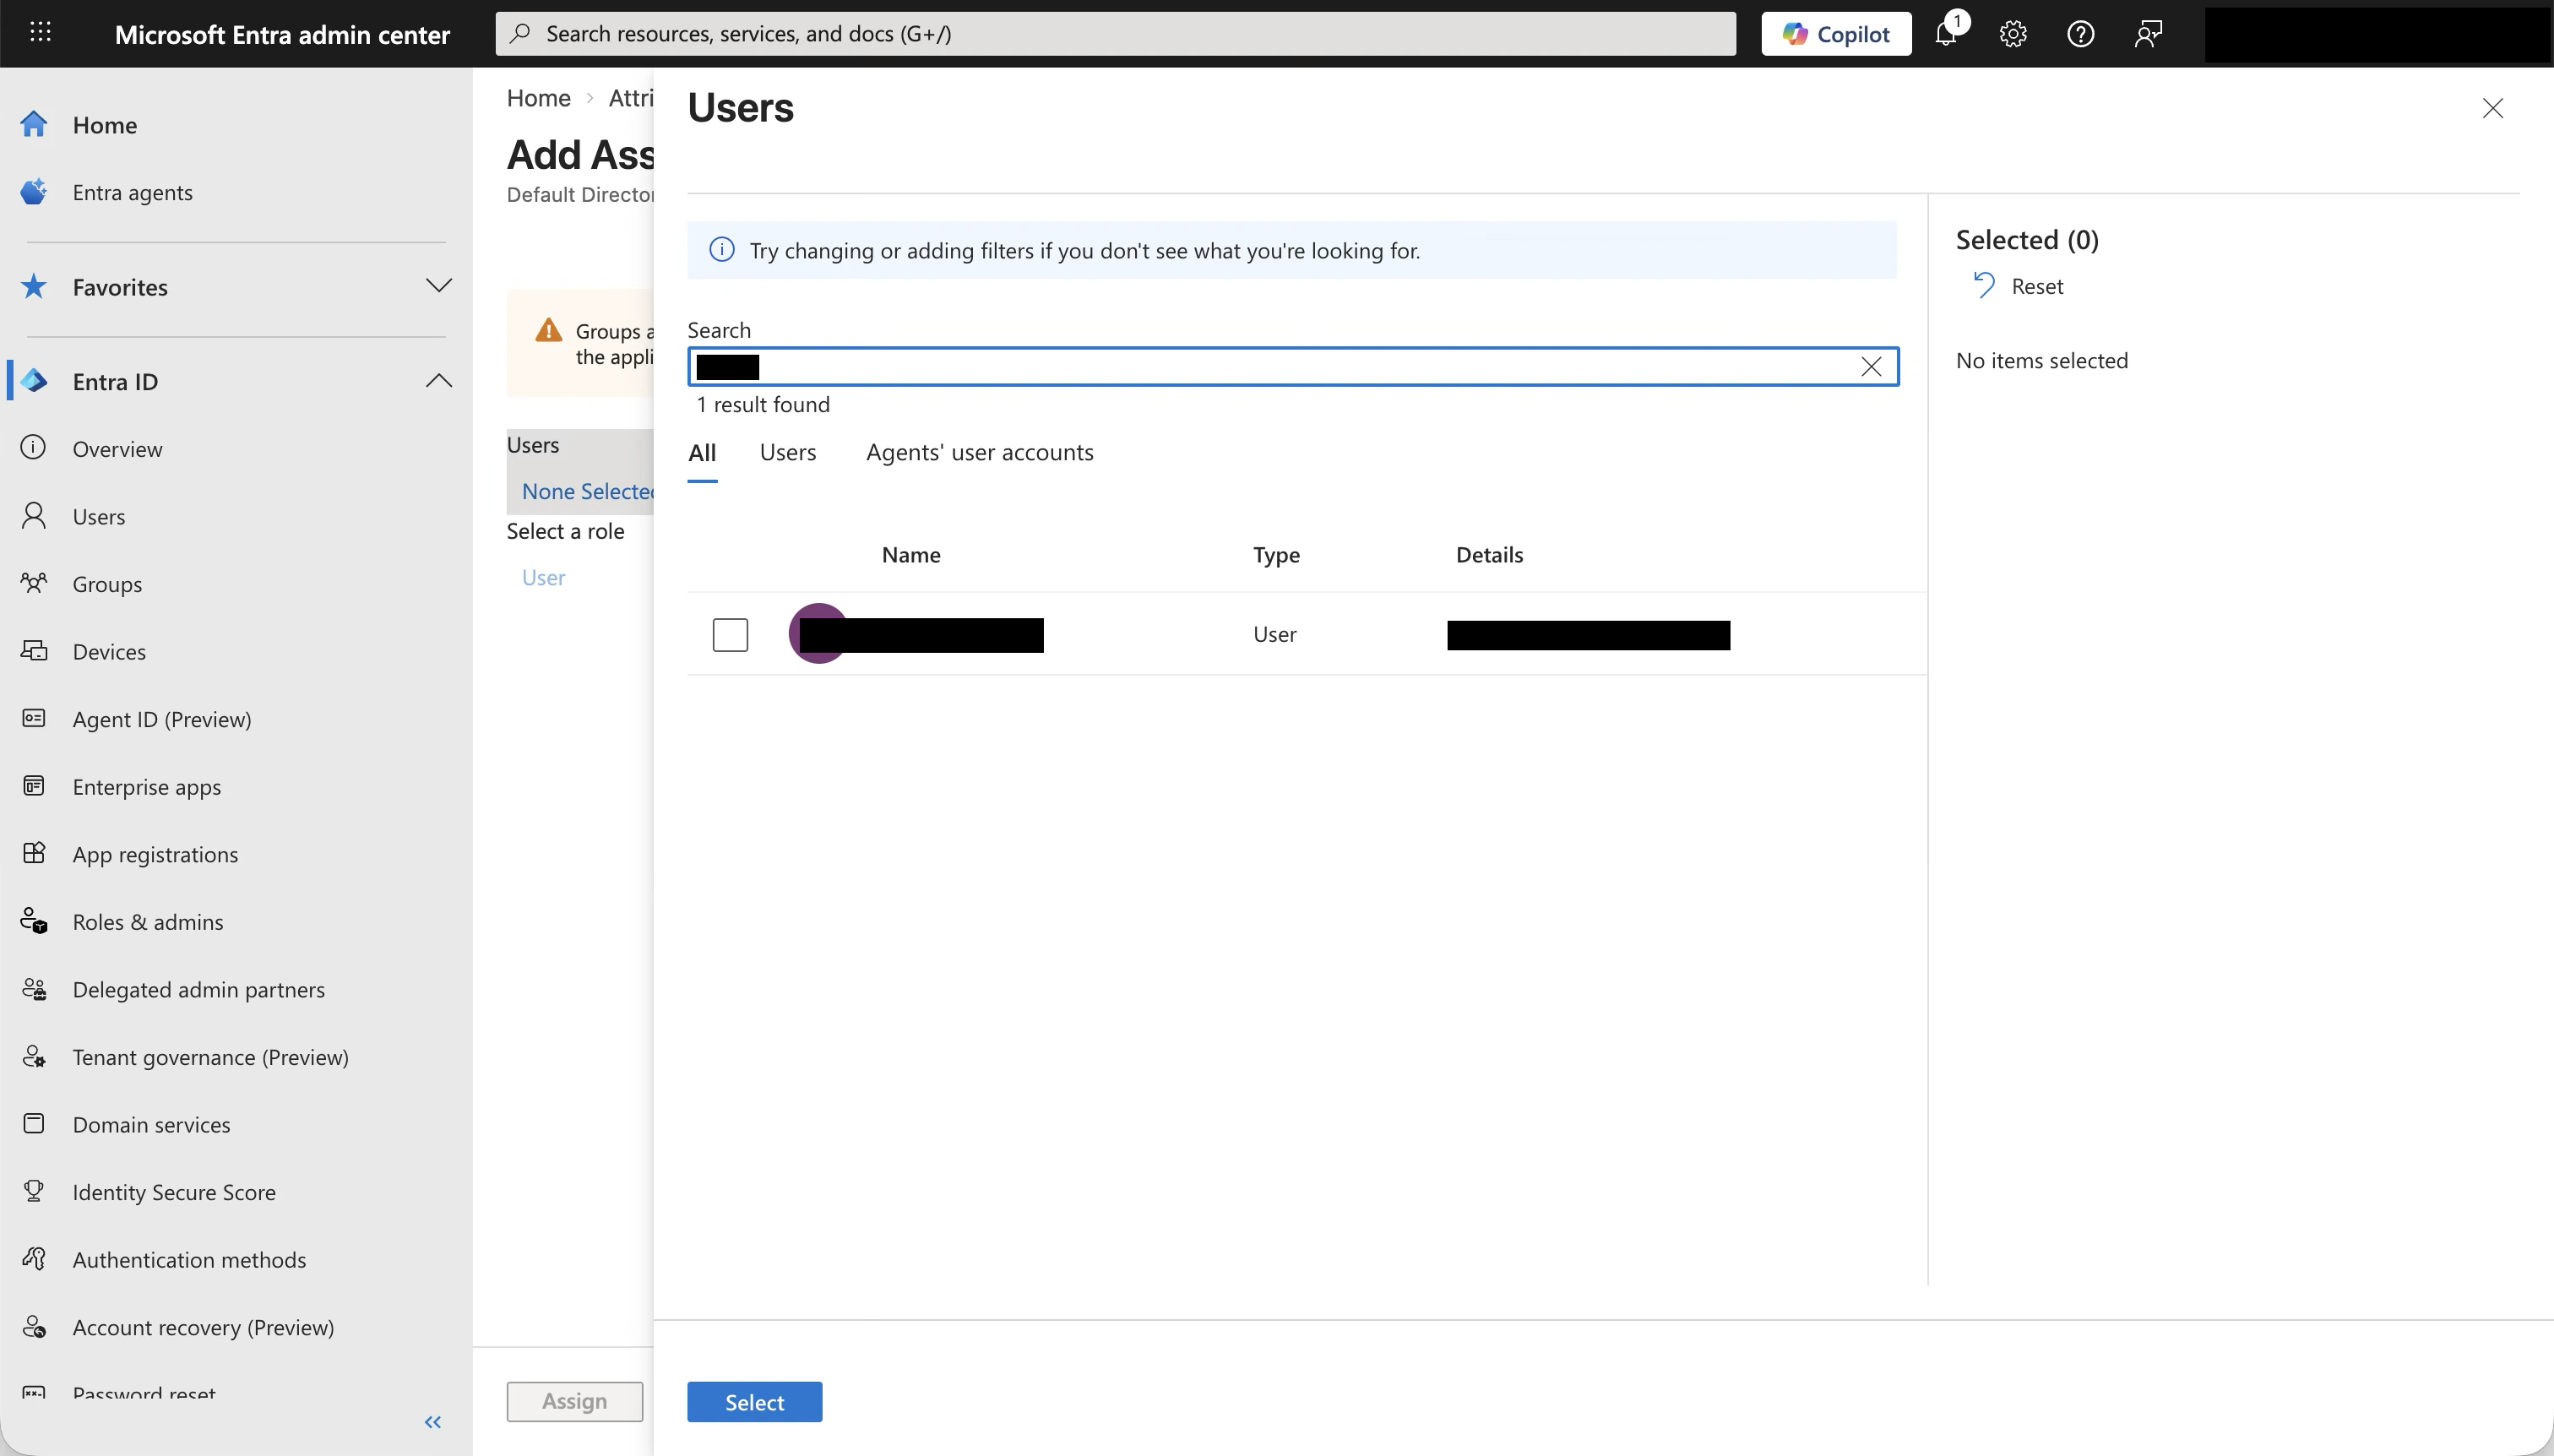
- Click Add user/group and select the users or groups who should have access
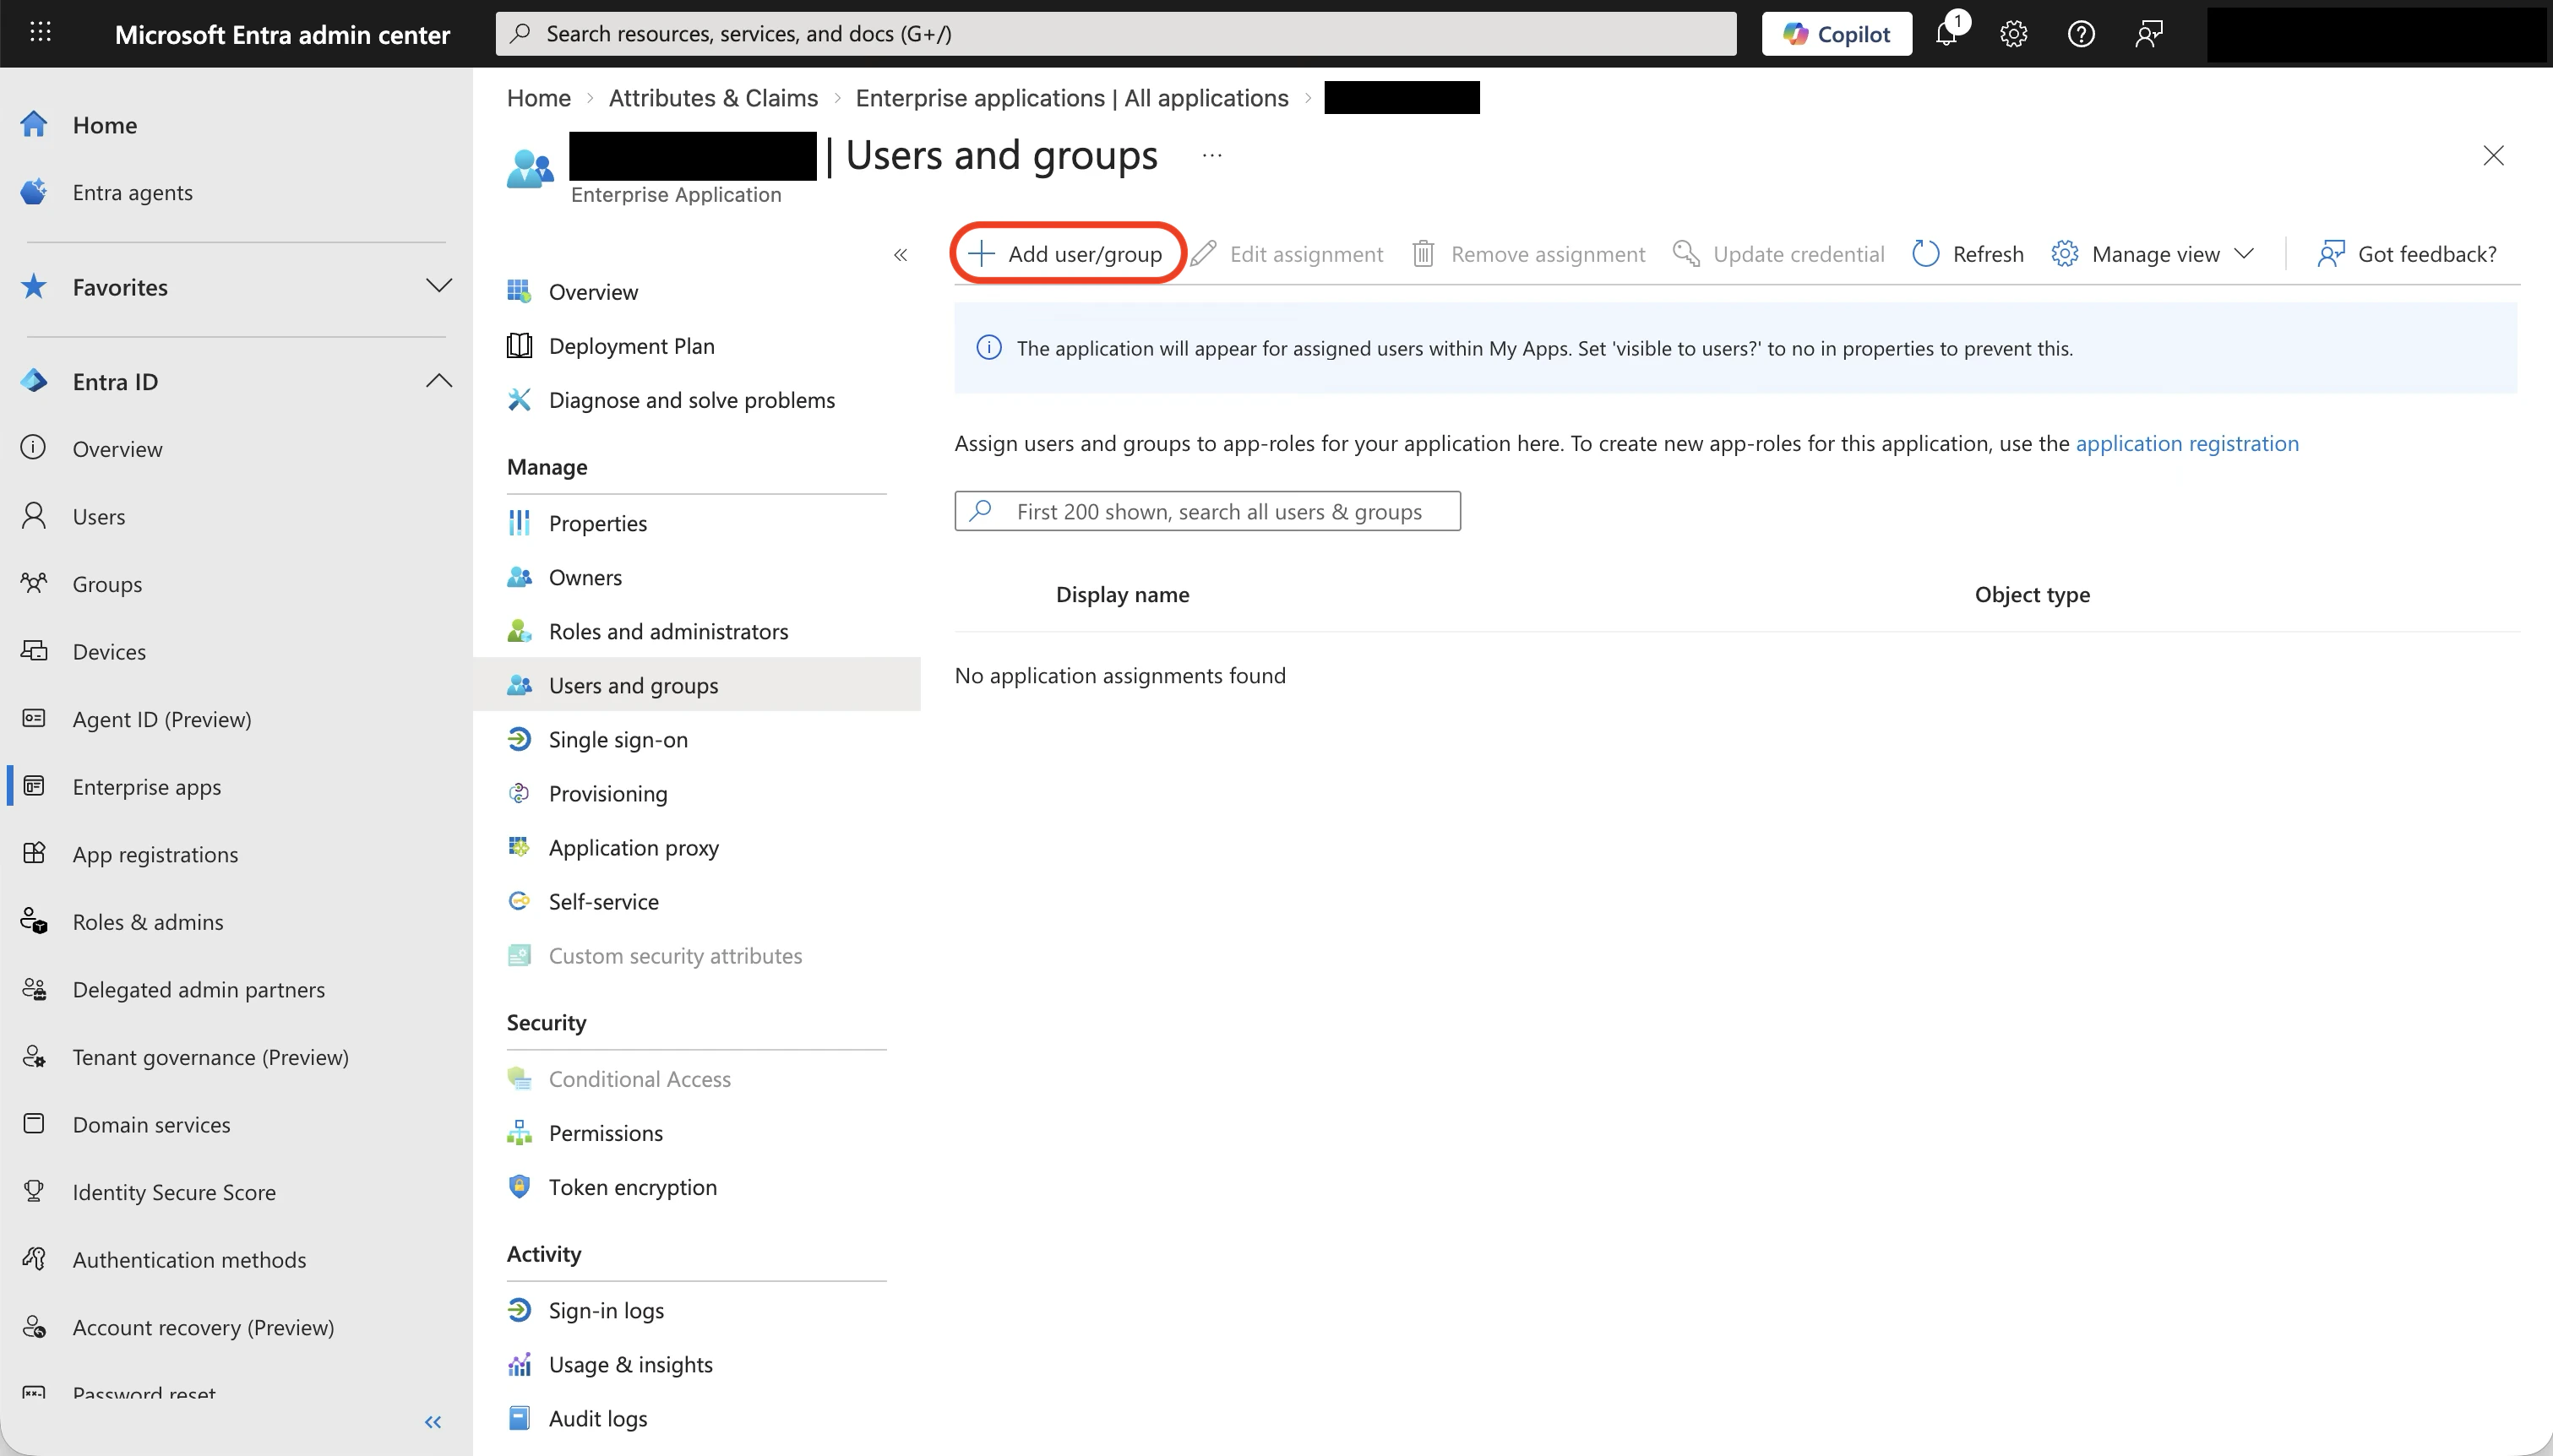
Only users assigned to the application in Entra ID can authenticate. If a user sees an error when signing in, check that they are assigned.
Step 6: Test the connection
Back in the Jitera SSO dialog, click Test Connection.- A new browser tab opens with the Entra ID sign-in page
- Sign in with a user account that is assigned to the application
- On success, a notification shows the extracted email, first name, and last name
- Verify the values match what you expect
Troubleshooting
Entity ID mismatch
Error: “The IdP Entity ID in the SAML response does not match your configuration.” The Identifier (Entity ID) in Entra ID does not match the Issuer value from Jitera. Open the Entra ID Basic SAML Configuration and verify the Identifier is set exactly to the Jitera Issuer value.Certificate error
Error: “The SAML response signature could not be verified with the configured certificate.” The certificate fingerprint in Jitera does not match the signing certificate in Entra ID. This can happen when Entra ID rotates its certificate or the certificate has expired. Check the expiry date shown below the fingerprint in the SSO dialog — if it is close to expiry or has already expired, re-fetch the metadata URL in Jitera to update the fingerprint.Domain mismatch
Error: “The email domain in the SAML response does not match your configured domains.” The email returned by Entra ID has a domain (e.g.@contoso.com) that is not listed in the Email domains field in Jitera. Add the domain to the list, save, and test again.
Missing attributes
Warning: “Some attributes could not be found in the SAML response.” One or more attribute names in Jitera do not match what Entra ID sends. Go to Attributes & Claims in Entra ID and verify the claim names match the values in Jitera’s attribute mapping fields.User not assigned
The user sees an Entra ID error page saying they do not have access. Assign the user to the Jitera enterprise application in Entra ID (see Step 5).Reference: field mapping summary
A complete view of where each value comes from and where it goes.| # | Value | From | To |
|---|---|---|---|
| 1 | Issuer (SP Entity ID) e.g. https://api.jitera.app/saml_sso/{uuid} | Jitera SSO dialog | Entra ID > Basic SAML Configuration > Identifier |
| 2 | Assertion Consumer Service URL e.g. https://api.jitera.app/users/saml/auth | Jitera SSO dialog | Entra ID > Basic SAML Configuration > Reply URL |
| 3 | App Federation Metadata Url | Entra ID > SAML Certificates | Jitera SSO dialog > Metadata URL |
| 4 | Email domains | Your domain list | Jitera SSO dialog > Email domains |
| 5 | Email claim name | Entra ID > Attributes & Claims | Jitera SSO dialog > Email attribute name |
| 6 | First name claim name | Entra ID > Attributes & Claims | Jitera SSO dialog > First name attribute name |
| 7 | Last name claim name | Entra ID > Attributes & Claims | Jitera SSO dialog > Last name attribute name |
Related
- Organization Settings: SSO Configuration - Generic SSO setup reference
- Microsoft: Configure SAML-based SSO - Official Entra ID SAML documentation